
App design process: The ultimate guide
All you need to know about the process of app design.
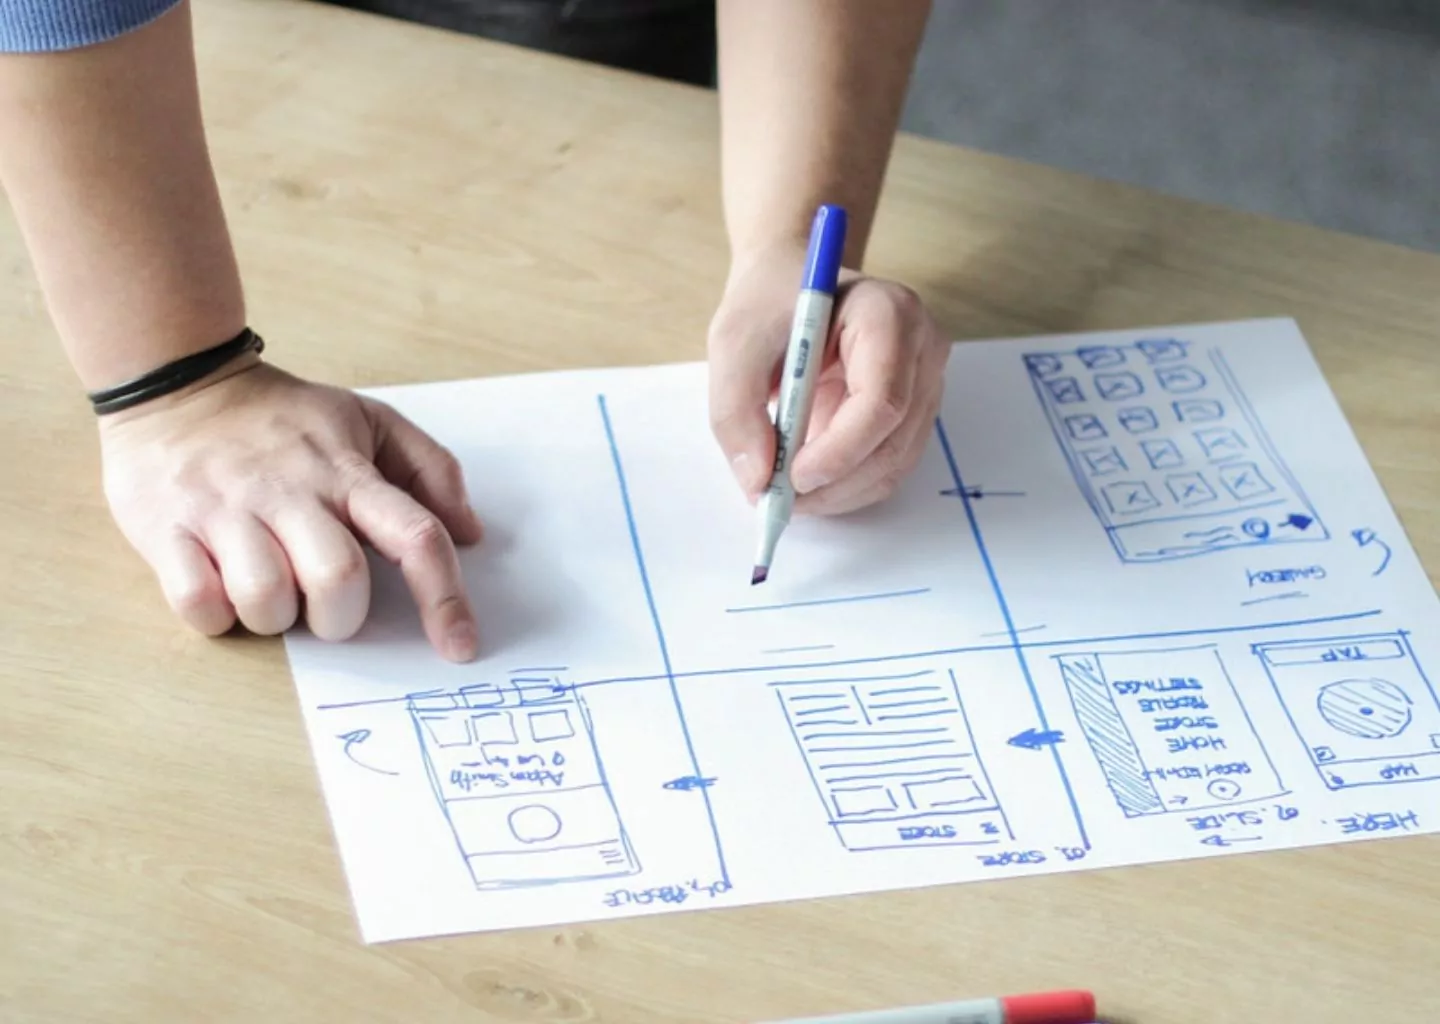
You’re starting a software project? Don’t ignore product discovery.
If you do, your product might belong to the 67.8% of apps below a 1000 downloads. If your app has such low numbers it means you didn’t understand what the market wants or needs.
Doing product discovery will combat that because you’ll understand the market, the users, and the problems they face.
In this blog, I’ll cover the steps within the process of product discovery so you can do it properly.
If you’re a project manager, a product owner, or any other stakeholder concerned with the process of discovery, this will be helpful to you.
By the end of the product discovery phase you’ll know:
Now let me guide you through all of the necessary steps to product discovery.
Your product discovery starts with a lot of assumptions. You have an idea for an app that will solve problems you instinctively feel need to be solved.
You might be right. Are you willing to bet considerable resources on your instinct alone, though?
I don’t think so. That’s why market research is crucial to the product discovery process.
You’ll want to make decisions that are as informed as they can possibly be.
Out of all failed apps, 25% of them fail due to inadequate research. You don’t want your app to be among that crowd.
Also, by keeping your ear to the ground, you’ll identify current trends in your niche that you can act on.
Not understanding the needs and problems of the target audience will hurt your app and subsequently your entire business. Obviously, understanding comes from thorough research.
So, here are the most valuable tips for mobile app development research.
Do a SWOT analysis
Doing SWOT analysis is one of the best ways to pinpoint and discover where you stand and what you can do.
What does SWOT stand for, though?
Strengths- What strengths does your app idea have that you can capitalize on? Maybe you have a feature in mind that no other app has?
Weaknesses- What weaknesses are there you could improve on? Maybe your initial idea isn’t good enough and you should get back to brainstorming.
Opportunities- Is there a gap in the market no one is exploiting? Could your app solve a problem that no one else has?
Threats- Be serious about this one. Take a look at threats both internal and external which could damage your app or your business.

The SWOT analysis can be applied both to your own business and to your competitors, which brings me to my next point.
Study competitors
Take a look at your specific niche. Let’s take fintech as an example. Study similar apps to the one you’d like to make.
The simplest way to find and analyze competitors that have similar mobile apps is to use a tool like App Radar.
Try to analyze what makes your competitors successful, or what makes them bad. Is it their UX design? Maybe it’s their cool features?
If you can understand what it is, you’ll be able to either reach the same standards or massively outshine anything they’ve made.
Also, your rivals comprise a huge chunk of the market you need to analyze so you shouldn’t be ignoring them.
Here are some steps to take when analyzing your competition:
Utilize the data you acquired to give yourself an edge against your competitors.
Understand the user
Without knowing who your target user is you’re tapping around in the dark.
Let’s say you’re making an app for nurses to review working conditions in UK hospitals. It’s very specific. Now ask yourself:
This example illustrates a very simple point: Just by knowing your niche you already know your target users. All you have to do is make conclusions.
After that, you should try to do focus groups, 1-on-1 interviews, and surveys to gather more detailed insight. This step will help you in creating your ideal user persona which we covered in the next chapter.
There are a few things you achieve when completing market research:
With market research being done, you’ve completed a major 1st step in product discovery.
Now let’s take a look at the 2nd step.
Next in the guide of product discovery comes the user persona. It’s a generalized, semi-fictitious personality assembled from characteristics gathered from detailed research of the target user.
A common way to present your user persona is in form of a user profile or template which can later be easily shared with other team members.

The image shows a user persona with the following information:
Depending on your niche and product you can also add other sections like motivation, channels, technical skills, expectations, devices used to access the internet, beliefs, etc.
But why exactly do you need a user persona?
If you don’t know at least generally who’s going to use your app, you’re not going to know who you’re making it for.
Customizing your app’s design, features etc. based on who your target user is will yield great results such as better ROI, better user retention, and better engagement.
Also, the more you work on and study your user persona the better you’ll understand what drives them, their motivations, and their goals.
Finally, your user persona will help you create a user-centered product and that should be your main concern when making an app. What will help with that as well is a journey map. Let’s have a look.
Journey mapping
When the persona is finished, the next step you have to take is to make a user journey map.
It’s a visualization of how your users are going to use the app. The user’s feelings and their experiences while using your app should be taken into account here.
Why do you need a user journey map though?
By creating a user journey map you’ll understand how to help users of your app much better.

The image above shows a useful user journey map provided by the Google Play Growth Consulting team.
As you can see they’ve identified key points in the user journey.
Positive points:
Negative points:
There’s always a chance for users to come back and it’s signified by the re-installed point which leads to the re-onboarded point.
You can use the Google Play app user journey to inform your own and adapt it to your own context.
You’re not sure why this part is important for app discovery? Here’s why:
Now that you’re finished with this part of product discovery you can turn your attention to features.
What’s next in the product discovery process? Now you must determine which features are a must-have for the pain points you decided to solve.
You’re going to be faced with a difficult dilemma: What to prioritize and more importantly what to cut?
Not often does it happen that a project manager is faced with the lack of features his team could implement in the app. A much more regular occurrence is an abundance of proposed features.
If you’re new to this you might intuitively think: “What’s wrong with more features? More is better, right?” Not in this case.
Here’s why:
No identity- Think about the big apps like Instagram, YouTube, Spotify, Facebook etc. You know their core function and therefore their identity. Adding too many features to your app will leave people thinking: “What the heck does this do?”
Resource drain- Making a lot of features will cost more money and manpower. Maybe that’s a waste you’re able to afford but I’ve never heard of any CEO or project manager willing to be wasteful unnecessarily.
Cluttered UI- The UX/UI designers are going to hate you for having to make this feature monstrosity into an easily usable and aesthetically pleasing app. Even after their professional touches, the features are still going to clutter the UI and you don’t want that.
More bugs- Biggie Smalls said: “Mo’ money, mo’ problems.” If he was in app development he’d have said the same thing about features. As you implement more and more features, the app becomes bloated and harder to optimize.
Confused users- The UX is one of the biggest victims of over-featuring. You want your users to move from point A to point B as efficiently as possible. Many features complicate that.
Now that you realize some of your darling features need to be cut from the plan, you must be asking yourself: “how do we do it?”
How many people will this feature affect within a given time period
Example: customer per quarter, transaction per month
How much will this impact individual users? Use a multiple choice scale:
3 = massive impact
2 = high impact
1= medium impact
0.5= low impact
0.25 minimal impact
Example: How much will this feature affect conversion rates?
How confident are we about the impact and reach scores? How much data do we have to back up those estimates?
Use a % score where:
100% = high confidence
80% confidence
50% low confidence
How much time investment will this initative require from product design and development?
Measure as persons per month (how much work one team member can do in a month).
Using the RICE method shown above, you could quantify feature importance which makes the decision-making process on features much easier.
Here’s how you can calculate feature priority: Multiply Reach, Confidence, and Impact, then divide them by effort.

With the RICE method you’ll have decisions informed by objective data rather than instinct.
While you’re thinking of features, you should simultaneously be making an app flow (user flow).
It should be done at the same time because an app flow influences features and vice versa. But what exactly is an app flow?
An app flow is a diagram of all planned content you’ll want in your app. It’s a map of all possible directions a user could take while using your app.
Why is an app flow important for product discovery?
Here’s an example of how it might look.

This example shows a fintech app flow detailing exactly where the user might go and how they’ll get there.
After the flow is made your designers should make the first wireframes. Why?
The main reason is to start creating UI for each and every one of the screens defined in the app flow.
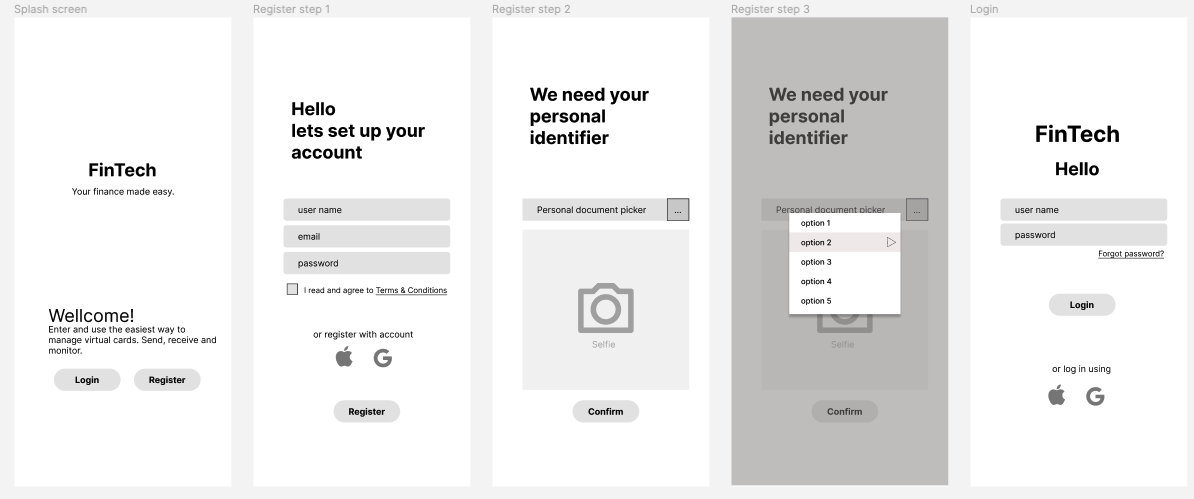
With the introduction of wireframes, you’ll have a clearer picture of what your app is going to be like and that’s the main point of product discovery.
What makes this step so important in your product discovery process?
Determining features and making an app flow and wireframes are important parts of product discovery.
They set the stage for our next, equally important step.
This is a crucial step in product discovery. This is where you choose the tech stack for the development of your app.
If you don’t know what a tech stack is, it’s a combination of tools, frameworks, languages, services, etc. that you’re going to use to make your app.
Your choices should entirely depend on a few factors:
Does it matter which technologies you choose? It does. Here’s why:
You could lose money if you choose wrong.
Let’s say you’re targeting the US market with your app. Quick research will tell you that iOS is the most used operating system there, holding 56.69% of the market share.
So if you choose to make an exclusively Android app for the US market it would be a mistake.
Choosing between operating systems isn’t the only choice you’ll have to make when it comes to technologies. Here are some others to consider:
Cross-platform apps can run on any device and any platform.
A native app is made with one platform in mind.
So how do you choose whether you want a cross-platform or a native app?
It depends on your app.
If you want:
Choose cross-platform.
On the other hand, if you want:
You should go native.
If you choose native there’s another choice:
On the other hand, if you choose cross-platform the main choice will be between the 2 languages most commonly used in this method:
React Native or Flutter.
Here’s an example of a tech stack for different methods of app development.

Choosing a tech stack is a complex task so it’ll be best for you to do it with your dedicated development team.
If you’re not sure why choosing a tech stack is an important step, here are a few reasons:
When you finish planning your tech stack, you’ve completed an important step in your product discovery.
Having done all the previous steps in product discovery, now you have to make certain decisions. Namely, you need to answer 2 questions:
How many people are going to be on the team?
How long is it going to take them to finish the project?
With the introduction of Agile methods to software development, the time it takes to hit the market with your app has split in half.
Not only that, but the team composition has changed a bit when compared to its waterfall counterpart.
Regardless of the methodology, you should consider the time and team size estimates.
By doing so, you create a more concrete picture of what it’s going to take to finish this project successfully.
This is especially important if you’re making an app for a client. They’ll want to see a detailed roadmap through app development and where their money is going.
While you won’t be able to give them exact numbers, you’ll be able to approximately estimate what you’ll need.
Let’s say you want to know how long it would take for your app to be made natively in Android. You’ll have to talk to the team lead of your Android team.
Along with them, you’ll be able to assess how many people in which amount of time are going to be able to finish the project.

Rough estimates such as the one above can inform your general outlook on how much time it takes to build an app but it’s not close to a full picture. For every specific mobile app you need to dig deeper.
So, Which factors determine the time and team size it takes to build your app?
If you want to get a bit scientific with the requirements it takes to build an app you should look into functional size measurement and different methods of it such as the COSMIC method or NESMA.
By precisely measuring the size of the software and determining how many function points will be required, you can assess the team size and effort needed to finish the project successfully.
Also, compare your previous projects similar to the current ones in order to estimate the team size and time needed.
One other important estimate after all the previous steps in product discovery is needed. Let’s take a look at it.
What makes this step so important for product discovery?
When you’re done with these estimations it’s time to calculate how much it will all cost.
This step in product discovery has to be done last since all the previous steps are its determining factors.
Does that make it the least important? Not at all.
Understanding how much money your project is going to cost means you can notice any deviation from that estimate and see what went wrong.
Also, CEOs and investors want to see how much money will be needed to make the app. The more detailed the budget estimate, the more confident the investors will be.
Aside from features, team size, and tech stack, there are other factors that play a part in budget estimation:
For example, an in-house team generally costs more than an outsourced team, especially if you’re based in western Europe or North America since wages are generally higher there than in the rest of the world.

On the other hand, if you hire a dedicated team from Croatia, the quality of code will be high yet you’ll pay less.
The complexity of design also plays a part because the higher the demands are on the UX/UI team the longer the hours, there’s more iteration, and the team maybe needs to be bigger.
The more third-party services you pay for that support your app, obviously, the budget takes a hit. For example, if you need payment processing, you’ll need a third-party service such as Stripe.
As much as third-party services might cost, they’re still not as costly as in-house development.
Take all these things into account so there aren’t any big surprises budget-wise.
Why is this such an important step in product discovery?
Estimating the budget is the final piece of the puzzle in product discovery.
Let’s summarize the general steps needed for successful product discovery:
You might have your own additional steps and that’s perfectly fine. For example, if you’re an app agency working with clients, you might want to create a string of wireframes for your client.
You can add your own steps but what you should not do is ignore the steps mentioned in this blog. If you do, you’re starting app development on very shaky foundations.
Want to leave app product discovery to someone else? Or do you want someone to take care of your entire app? We got you covered, let’s talk!

Ivan is truly passionate about what he does. In his role as Lead Product Manager, his strength is shaping products that not only meet market needs but also wow their users. And with over a decade of experience at software companies and startups, he knows all the ins and outs of building successful products. In his spare time, he enjoys staying active, whether it's hitting the gym, playing sports, or hiking. His dream office? A terrace in Komiža on the island of Vis, taking in the warm Adriatic sun.
All you need to know about the process of app design.

Here, we'll show you how to conduct mobile app market research and discuss why it's so important.