
13 iOS app development tools you need to know about
Are you looking to develop an iOS app but unsure where to start? Check out these 13 essential iOS app development tools that will help you create a successful app.
1.96 million.
That’s the number of apps hosted on the Apple App Store in 2022.
It’s an impressive number, no doubt.
But what’s even more impressive is that it’s no small feat to create an iOS app.
It takes a great idea, a dedicated development team, lots of grit—and this nine-step process.
The most important—but sadly also often overlooked—step in app development is market research.
The thing is, many product owners and entrepreneurs think they already have a killer app idea. But it often turns out to be the wrong or unprofitable one.
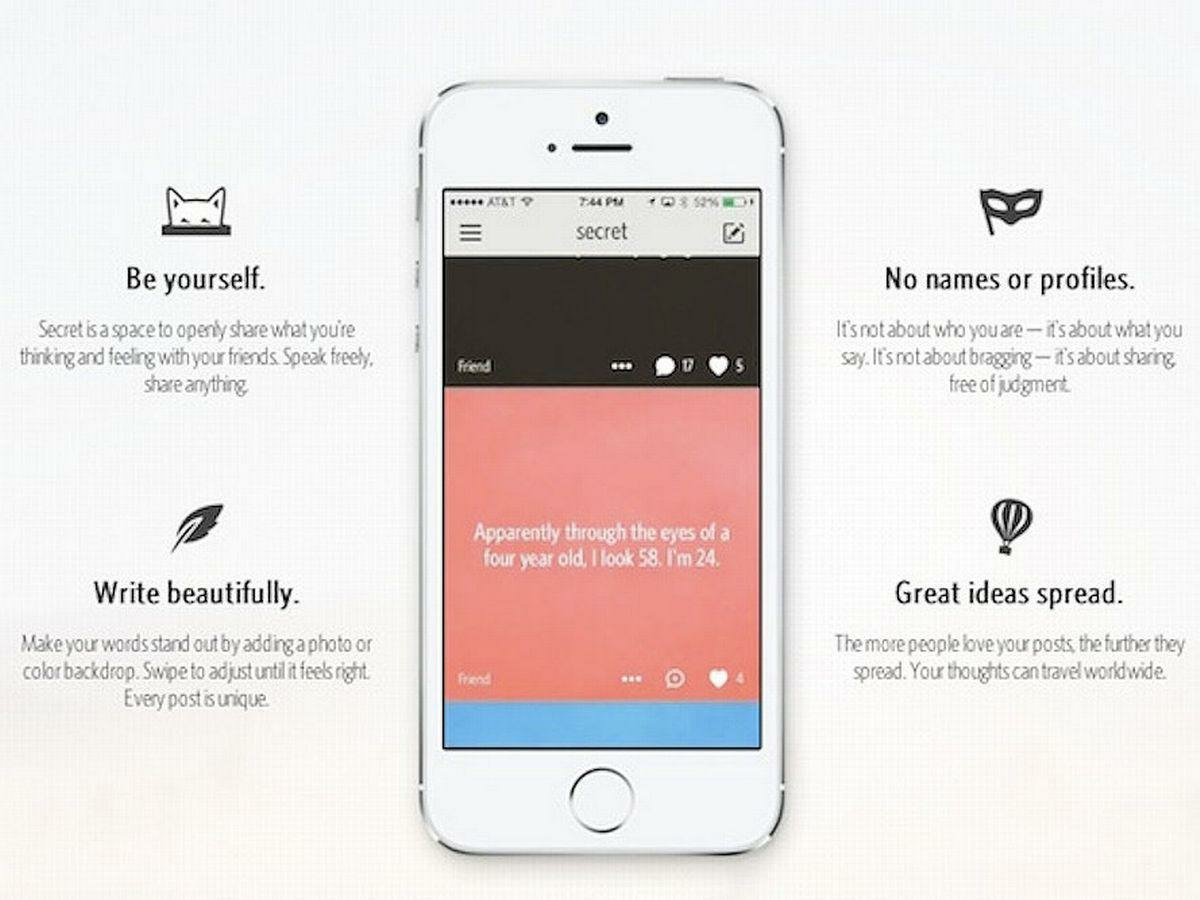
Consider the social media app Secret, which allows users to post stuff anonymously. The aim was to give people a platform to be free to express themselves.
It seemed like a good idea until the founders realized the app was used for cyberbullying and harassment. It was shut down just 16 months later.
Source: The Mirror
The only way you can validate your app idea and avoid these failures is through market research. There are various ways to do this.
It can be as simple as asking important questions.
The two most important are “What problem is your app solving?” and “Who will the app help?”
These can help you determine if there’s a real need for your app idea. If it’s solving no one’s problem, then there’s no need for it.
The best way to answer these questions is to ask your intended market. Run a survey asking them about their pain points, and ask if they’re willing to use your app idea to solve them.
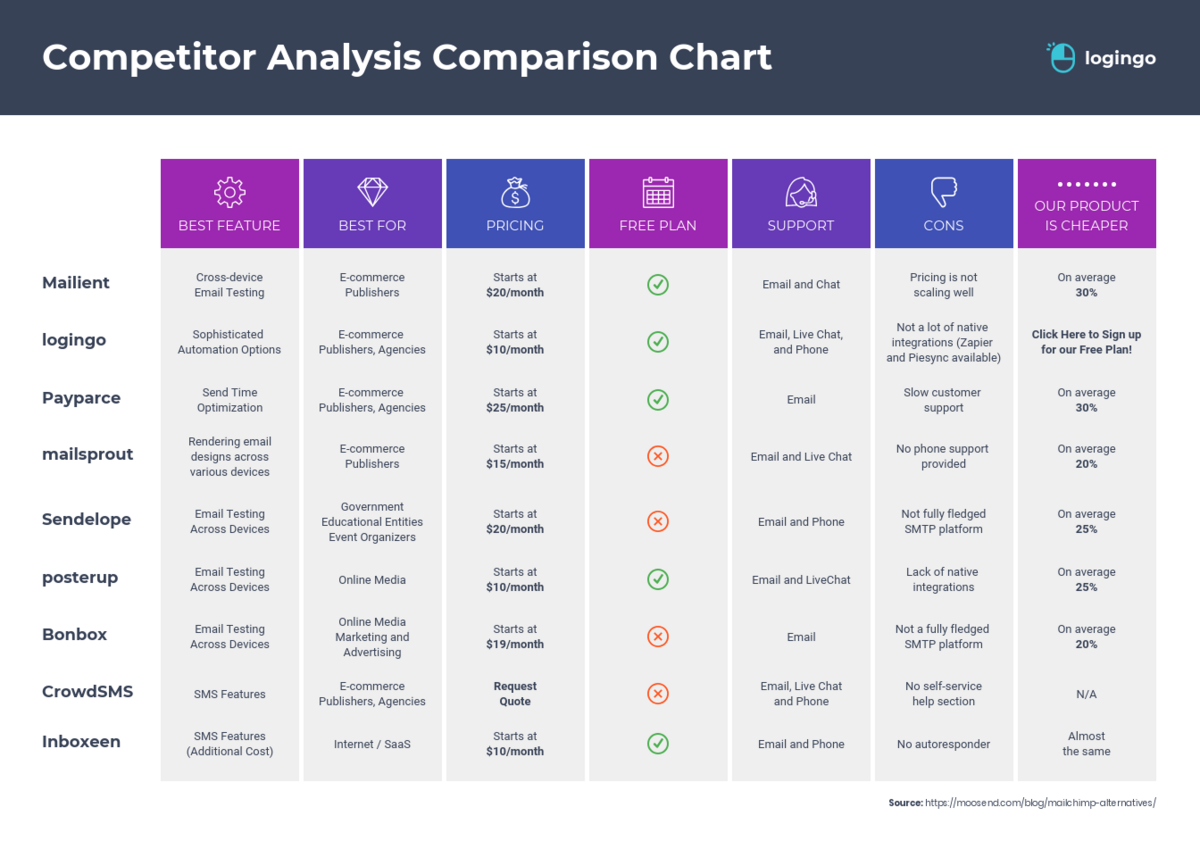
You should also run a competitive analysis, which forces you to look at your direct and indirect competitors.
The goal here is to evaluate their strengths (which you should improve upon or adopt) and weaknesses (which you should avoid).
Source: Venngage
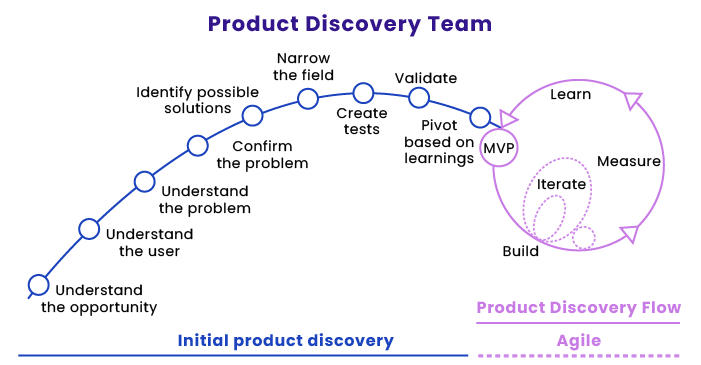
But the simplest and perhaps the most effective is performing product discovery.
This thorough process refines an idea and prioritizes key features to create a winning product.
It requires expertise to pull off, though, so we recommend getting the help of an experienced agency like DECODE.
Source: Ruby Garage
However you want to do market research, asking the right questions is crucial. Then ensure you get quality answers by sourcing them straight from end users.
Any development team worth its salt should begin every project with a software requirements specification (SRS).
Not doing so is like an architect building a house without blueprints.
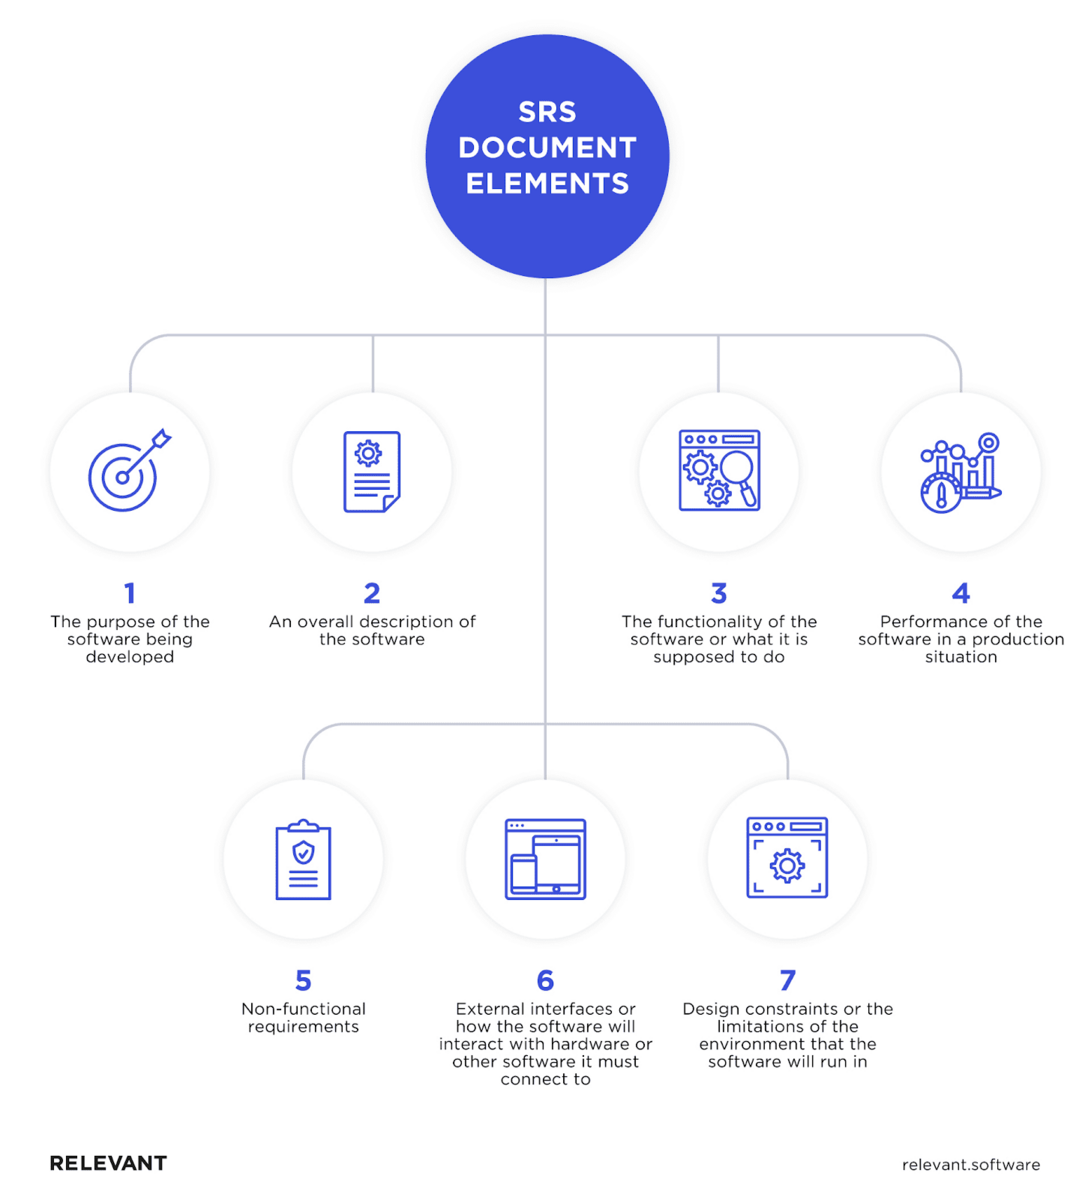
An SRS document outlines all relevant details about your app project—its requirements, features, and constraints.
It serves as the single source of truth between the development team and stakeholders. It ensures that everyone knows and agrees to the project’s details.
An SRS gives clarity that helps avoid misunderstandings during the development process.
Furthermore, the SRS becomes the basis for all other documents you’ll use in the project, such as the statement of work (SOW) and outsourcing contracts.
When creating an SRS, you should always collaborate with the client. The document should include, at a minimum, the following elements.
Source: Relevant
The purpose and description represent an overview of your app idea. Filling these sections shouldn’t be a problem if you’ve done your market research.
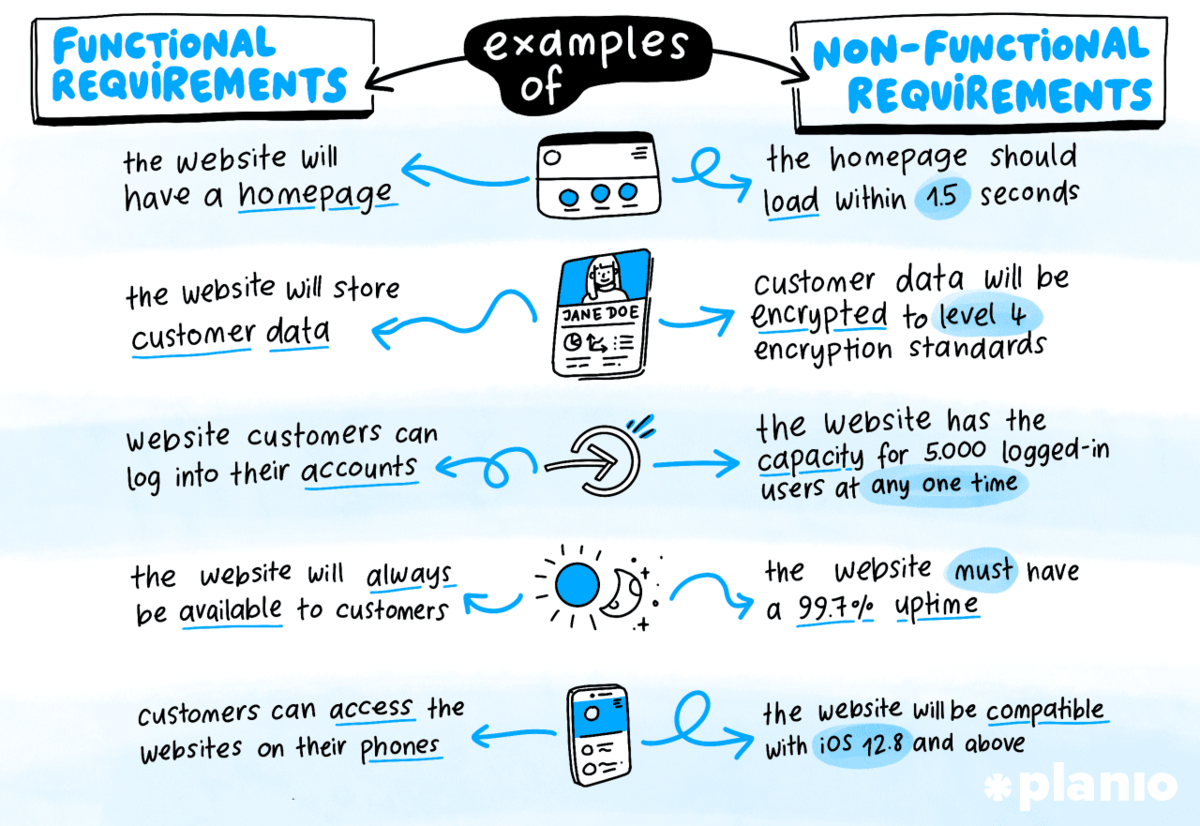
Next comes the most crucial part of the SRS: functional and non-functional requirements.
Functional requirements refer to the things the app should do. They cover the specific features that will help solve the user’s needs and fulfill the app’s purpose.
A feature for automatically calculating the fare on ride-hailing apps is one example.
Non-functional requirements, on the other hand, refer to how the app performs. This involves metrics like load speed, latency, and crash rate.
For example, the non-functional requirement of any fintech app should be the protection from hackers and fraudsters.
Source: Plan.io
Lastly, the SRS should also discuss the constraints and limitations of the software so that the developers can compensate for it during development.
It also ensures that their work doesn’t go beyond the project scope.
Once you have your SRS, it’s time to look at the tools you’ll use to get the job done—otherwise known as your technology stack.
Carefully picking which technologies and third-party libraries to use is crucial, as there’s rarely a one-size-fits-all solution.
Every project has different requirements and limitations that need specific tools to tackle.
With the wrong tools, your development will take longer or cost more, and the quality of your app will suffer.
Fortunately, when you’re developing iOS apps, Apple’s native technology stack has you covered.
Source: Quytech
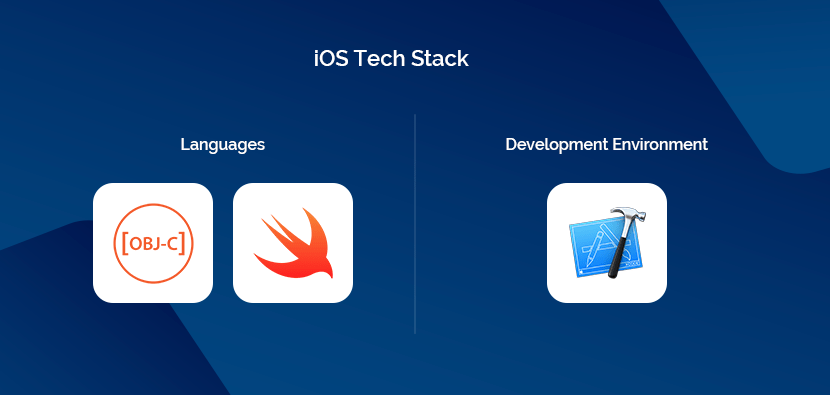
XCode is Apple’s integrated development environment (IDE) and has everything iOS developers would need.
It includes a source code editor, powerful build tools, and even a Simulator for testing your app on virtual Apple devices.
This stack also includes the programming languages Swift and Objective-C.
The former is more than capable of creating iOS apps, thanks to their speed and ease of use, so it’s best to stick to it for most projects.
Objective-C is mostly used for dealing with legacy apps.
iOS also supports C++. This complex but fast language is best for computationally demanding apps like finance or 3D mobile games.
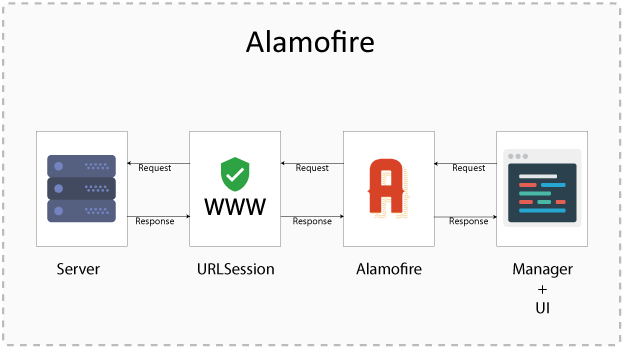
Aside from these, there are also great third-party tools you can use in specific situations.
For instance, Alamofire is a great networking library that simplifies HTTP calls in iOS code.
Source: Innovation M
You can also use Realm or Core Data for your app’s database management.
The former is great if you have cross-platform apps, as it plays the role of a centralized data store for your entire system.
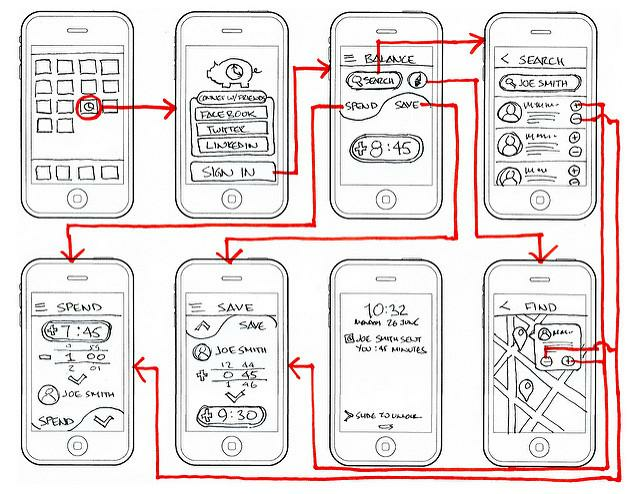
A wireframe is a two-dimensional sketch of your app that roughly shows how your app will look.
It’s a validation tool that allows you to refine your app design early on by asking people for feedback.
The great thing about a wireframe is that you can put it together very quickly, thus enabling you to iterate your design rapidly.
The core philosophy of a wireframe is simplicity. A wireframe should only contain simple shapes like squares and circles.
Placeholders are used in place of images, and color is never used unless it’s integral to the design.
In some cases, wireframes can also show simple navigation.
Source: Icons8
Sometimes the best approach is to just use pen and paper, as not only can you draw faster, but you don’t need to learn any new tools to do it.
However, if you have no qualms about learning new design tools, there are many you can use to create wireframes, such as Justinmind and Adobe XD.
An iOS app’s design is as important as its functionality, so you should consider it carefully during development.
That’s because a properly-designed UI significantly impacts user experience (UX). When your app is visually appealing, responsive, and easy to use, people enjoy using it.
Otherwise, users would gladly drop it even if it had innovative features.
Indeed, a study showed that great UI design could increase conversion rates by 200%.
Luckily, iOS developers have the perfect resource for creating effective UI—Apple’s Human Interface Guidelines.
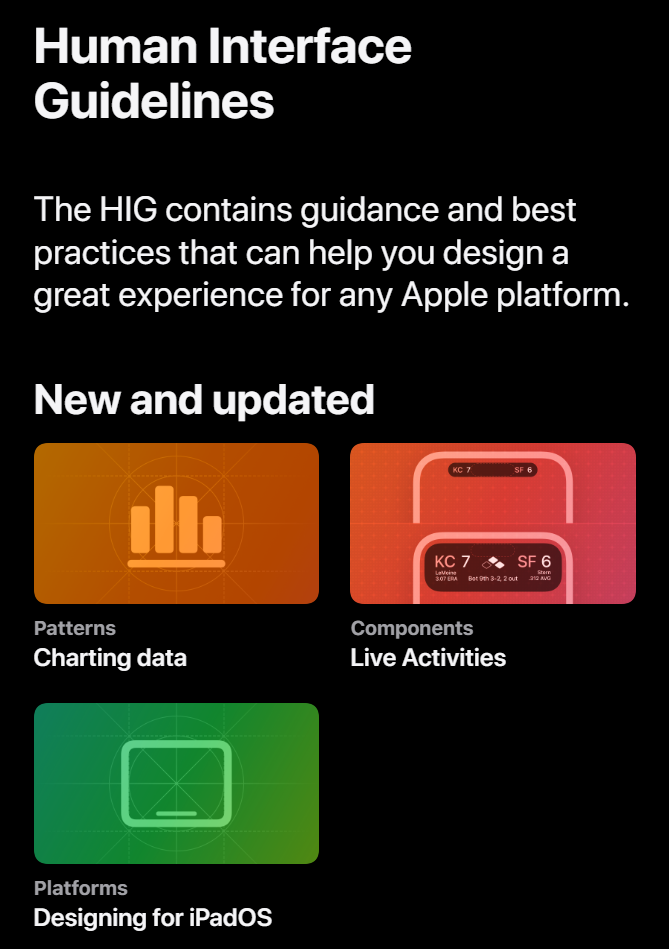
Source: Apple
This is a set of best practices and guidelines set forth by Apple for iOS UI design. It covers every aspect, from color and typography to layout and navigation.
It’s part of the reason many iOS apps have a similar look and feel.
Complying with the Human Interface Guidelines is an easy way to adopt great UX in your app.
Plus, it also improves the chances that Apple will approve your app for inclusion In the App Store.
Your app architecture refers to the internal wiring of the app—how the different components are arranged and interact with each other.
Just like how a well-wired electronic device works without any issues, an app with a well-thought-out architecture ensures stability and scalability.
Apple recommends that iOS apps follow the MVC (Model-View-Controller) architecture.
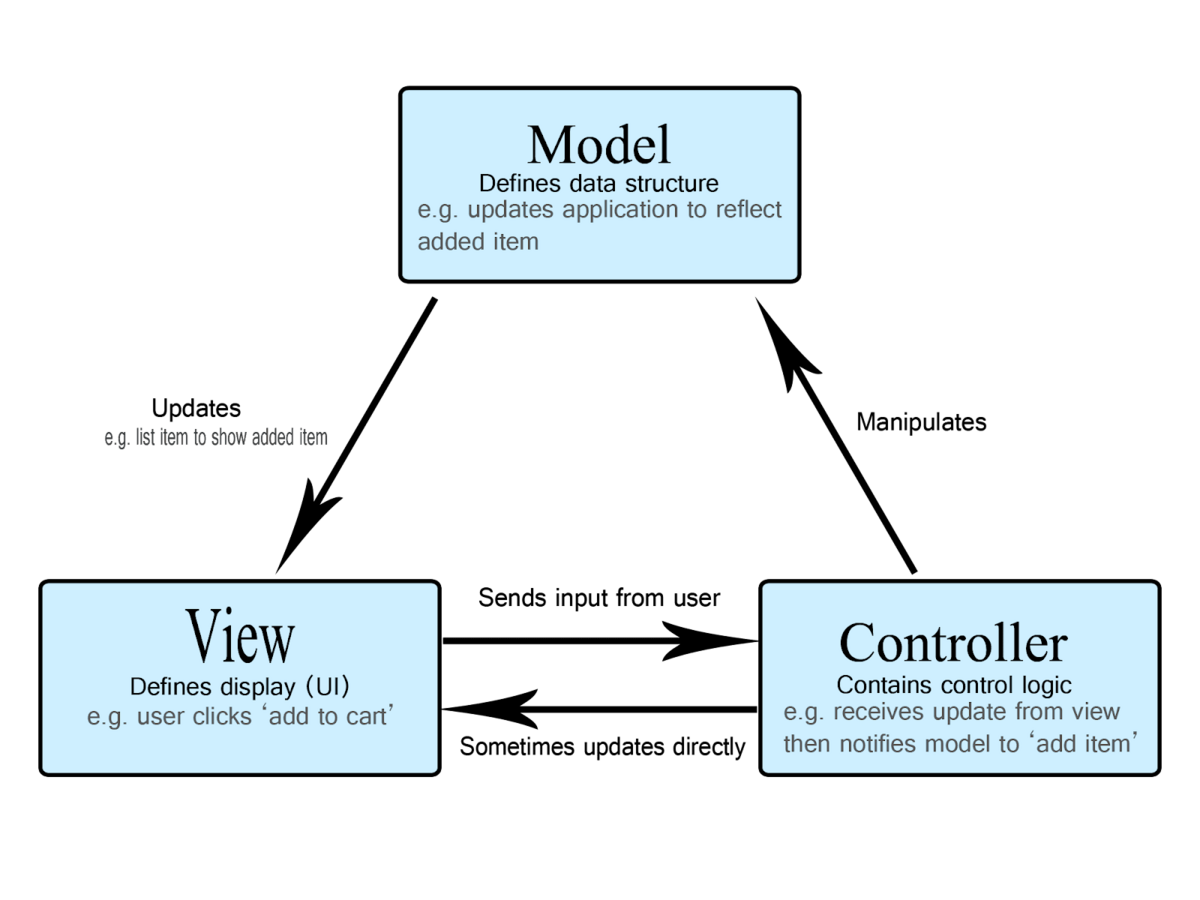
Source: Mozilla
The MVC model separates the app’s UI, data, and logic into View, Model, and Controller components, respectively.
Organizing the app this way makes it more modular and is thus easier to develop and maintain.
However, MVC may be too simplistic and limited for larger and more complex apps. Fortunately, there are other architectures you can consider.
For instance, the Model-View-ViewModel (MVVM) adds data binders to the mix, thus making It even more modular than MVC. It’s the architecture of choice here at DECODE.
Or, if you want even more modularity, you can consider the VIPER model, which involves five components.
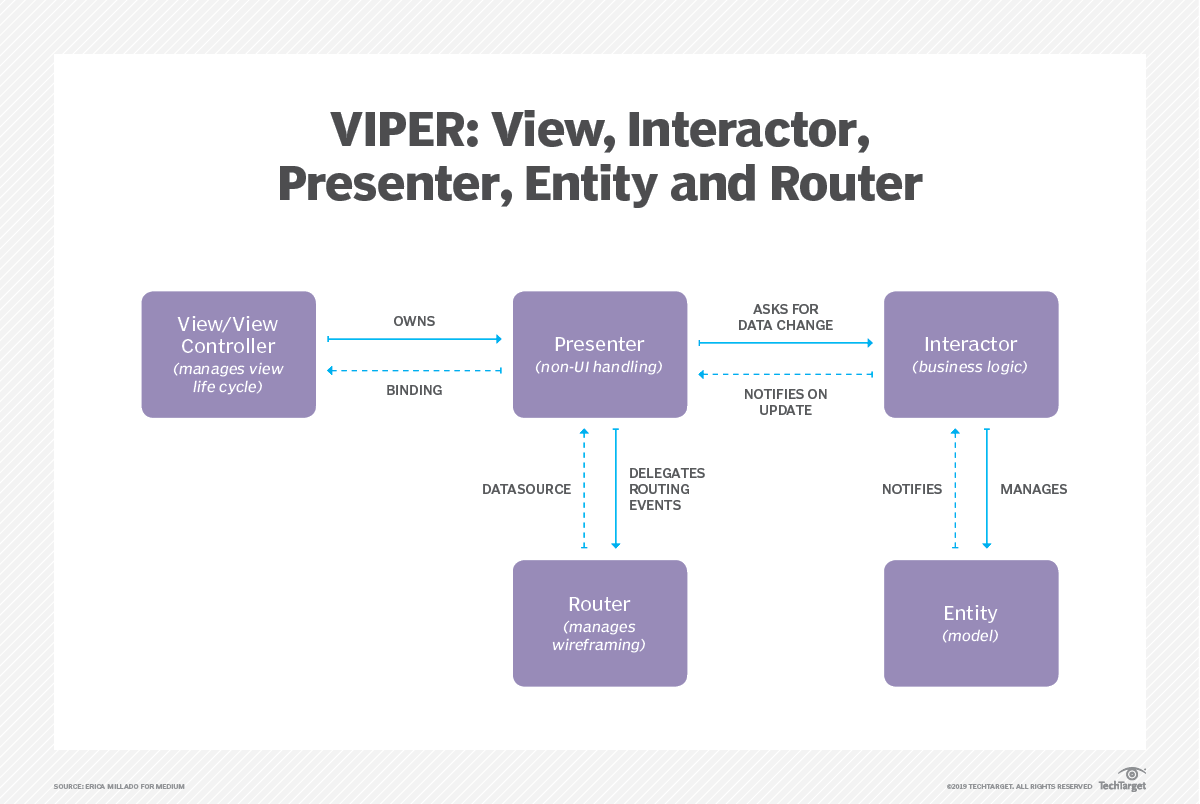
Source: Tech Target
For more information on mobile app architecture, check our excellent primer here.
With all the preparations done, it’s time to get to the main event—development. Here, the developers will begin writing the app’s code.
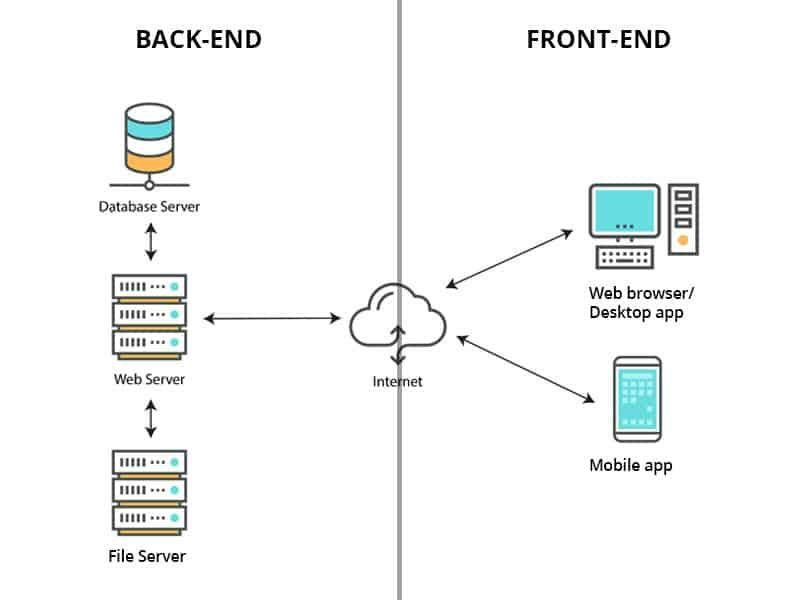
For most apps, this involves front and back-end development.
The front end refers to what the users see—in this case, the app itself. It involves developers coding the app’s user interface, navigation structure, and certain logic.
The back end, on the other hand, is where most processing happens. It includes code sitting on the web server and database.
Connecting the two halves is the application programming interface or API.
For example, when a user searches for something in the app, that request is sent to the web server via an API to be processed.
It gets data if needed, then sends it back to the app front-end to display to the user.
Source: mindphp
Front-end and back-end development constitute the critical step that could make or break your project.
That’s why you must only entrust it to an experienced development team like DECODE, with tons of successful projects under their belt.
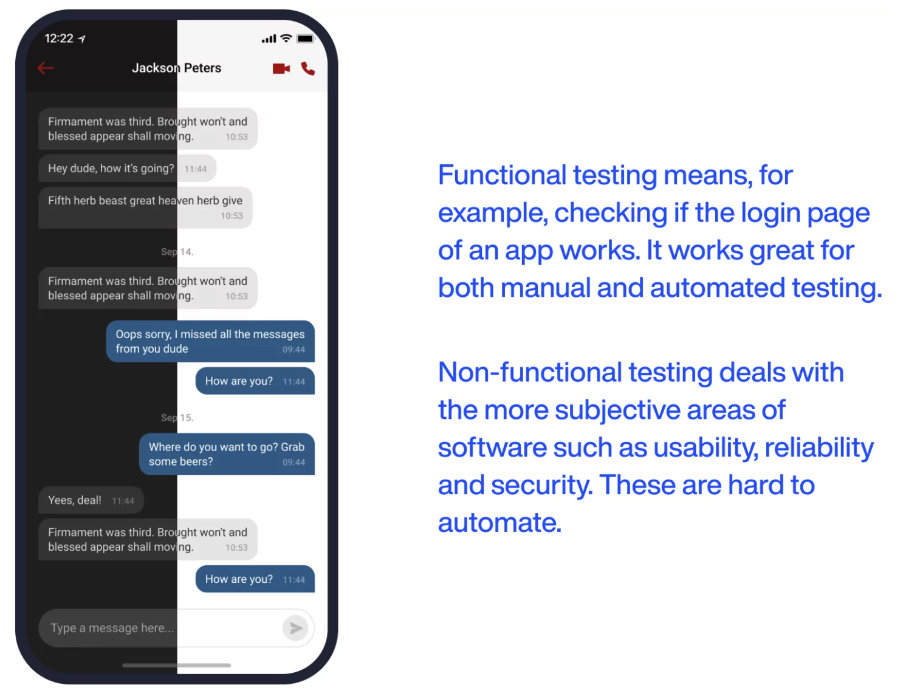
Testing is what separates a good app from a really great one. Doing it ensures that the app performs as expected and has as few bugs as possible.
To do this, you can use various functional and non-functional testing methods. Both types are required to evaluate your app fully.
Here’s a breakdown of their differences:
Source: DECODE
Now, let’s briefly talk about a few tests you’ll encounter.
You’ll often begin with smoke testing, a low-level procedure that checks whether the app or code is ready for further testing.
It’s a gatekeeper method that precedes other, more rigorous tests.
Performance testing refers to a collection of methods that evaluate how well the app is running.
It involves checking its load capacity, scalability, and response speed. Sub-tests here include scalability testing, load testing, and stress testing.
Lastly, I want to mention usability testing, a non-functional method that measures the UX of your app.
It’s often conducted on end users to verify if the app fits their needs and preferences well.
Once your app is complete, the last step is to publish it in the Apple App Store.
However, it’s not as simple as uploading your app and hitting Publish.
The Apple App Store is notorious for having one of the most stringent review processes in the industry.
They rejected roughly 5 million apps—or roughly 33% of submissions—per year between 2017 and 2019 alone.
To improve your chances of success, ensure your app complies with Apple’s App Store Review Guidelines.
It would help if you also look for the common reasons for rejection and find ways to avoid them.
We cover these mistakes in our article here.
But to give you a rough idea, common factors include inappropriate content, poor performance (like long load times and latency), signs that the app is incomplete, and using private APIs.
There you have it—the simple nine-step process to creating an iOS app.
Of course, in practice, there are various challenges, roadblocks, and issues you’re likely to face at each step.
That’s why you must rely on a talented development team to get you through them.
And with DECODE’s skilled team of iOS developers and successful iOS projects under their belt, we believe we’re the perfect partner for your next project!
Interested? Schedule a FREE consultation with us today.

Skilled in React Native, iOS and backend, Toni has a demonstrated knowledge of the information technology and services industry, with plenty of hands-on experience to back it up. He’s also an experienced Cloud engineer in Amazon Web Services (AWS), passionate about leveraging cloud technologies to improve the agility and efficiency of businesses. One of Toni’s most special traits is his talent for online shopping. In fact, our delivery guy is convinced that ‘Toni Vujević’ is a pseudonym for all DECODErs.
Are you looking to develop an iOS app but unsure where to start? Check out these 13 essential iOS app development tools that will help you create a successful app.

Discover the top languages for iOS development, and find out which one best suits your needs. Learn about the advantages of each language, and how to get started with iOS development.

In this article, we'll talk about 10 crucial tools for iOS app development.