Android apps give you much more freedom than iOS apps, as the platform fosters flexibility.
However, that also makes Android development more challenging.
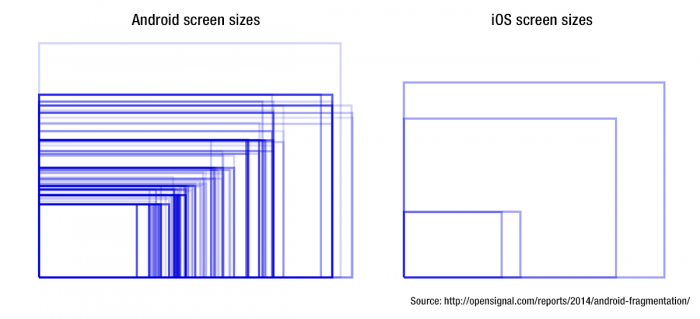
Aside from the overwhelming number of tools at your disposal, you also need to consider hundreds of Android-compatible devices, each with its own screen resolutions and hardware specs.
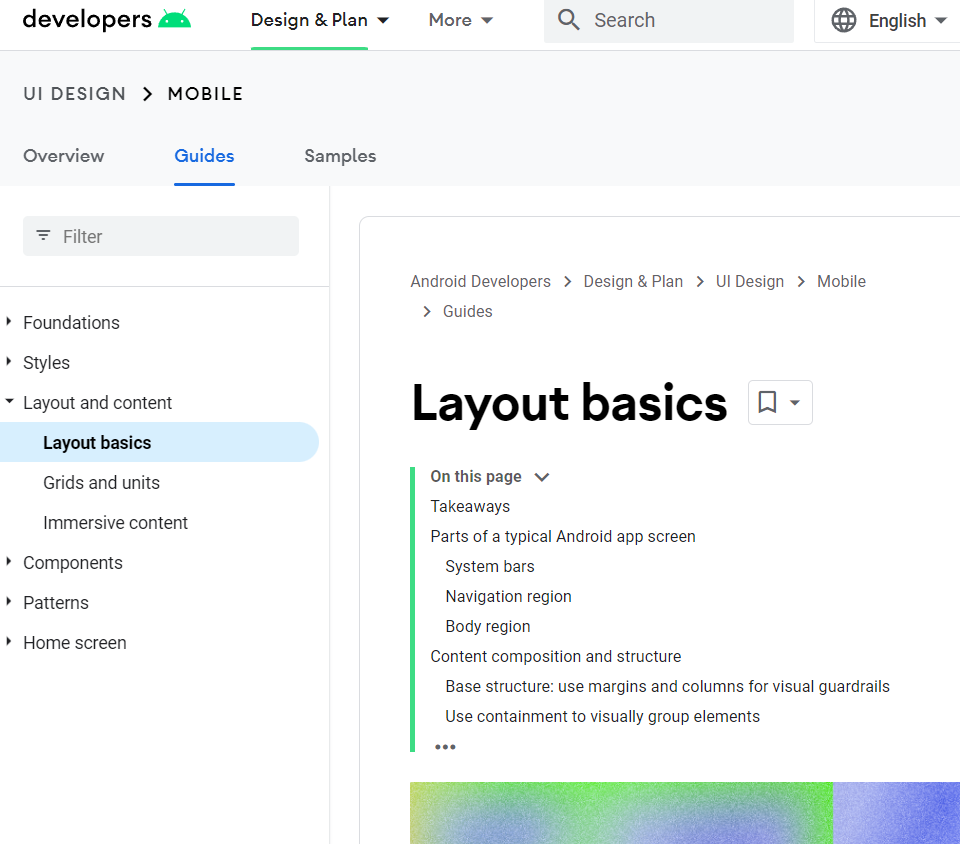
The Android Design Guideline is a comprehensive collection of principles, tips, and techniques for designing visually pleasing Android apps.
It covers everything from layout basics to how each UI component should function and look.
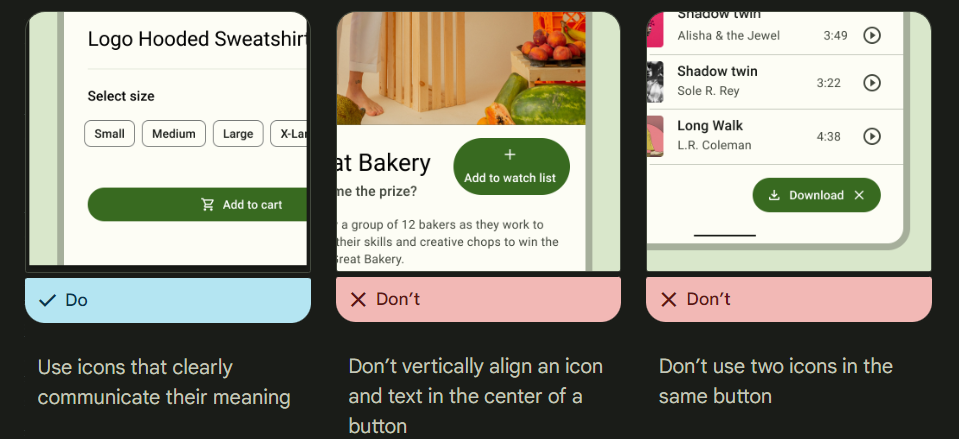
For instance, the Android Design Guidelines advocate having rounded corners for UI buttons. It also says not to use two icons in a single button, among other tidbits.
The Android Design Guidelines make app design easy because you don’t need to rely on trial and error.
By simply following the principles laid out, you’re guaranteed to get an intuitive, pleasing UI with much of the guesswork.
Guidelines also help you achieve a consistent look that any Android user would recognize.
This could help them pick up and use the app immediately with minimal learning curves, thereby improving your retention rates.
Even a slight change in UI design can jar a user, even if they can’t pinpoint exactly why. This could create mental friction that hinders the user experience.
Keep up with the latest Android trends
The Android app development world changes all the time. Thus, it’s your job as a developer or team leader to keep up with these shifts.
For example, Google regularly releases new versions of its Android Software Development Kit (SDK). This could introduce new features or tools you can use in your apps.
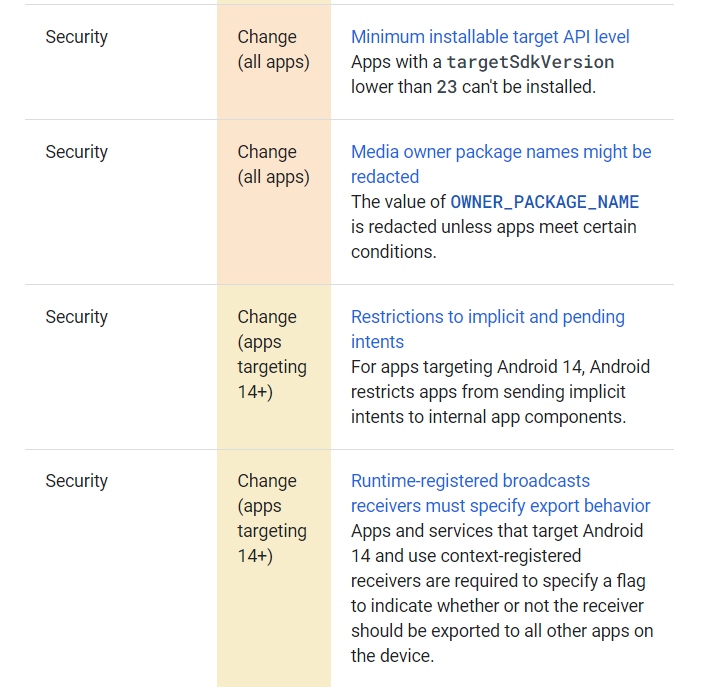
More critically, they also contain fixes for security vulnerabilities that threaten your app’s safety. Without them, your users are at a higher risk of hacks and exploits.
For instance, here are the security updates for the upcoming Android 14 release:
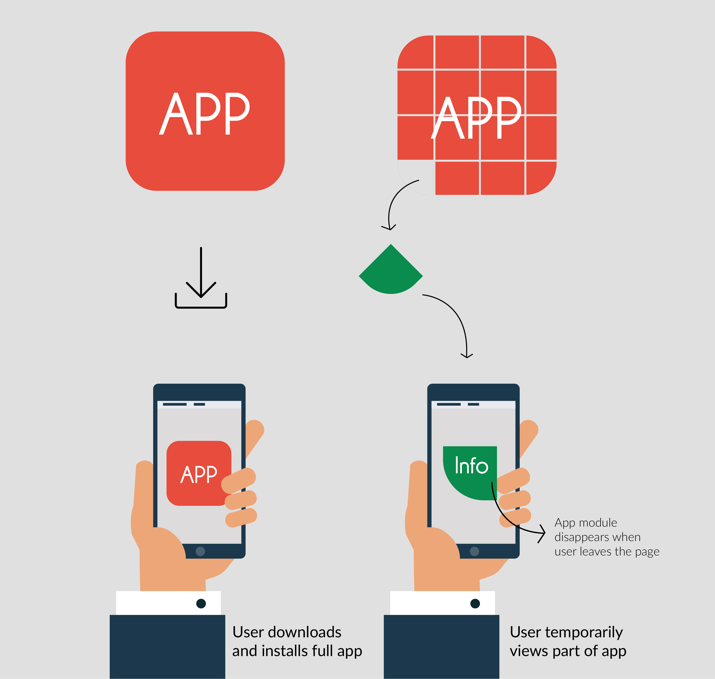
This is a new approach where you don’t need to install an Android app before using it. They could simply click a browser link, and the app would load immediately.
This is possible because an Instant App is segmented in a way that allows partial loading.
Instant Apps eliminate the time-consuming step of downloading the app, thus making it as responsive and instant as a web page.
This could help improve retention rates immensely. It’s also a potential marketing tool that allows users to experience your app before downloading it.
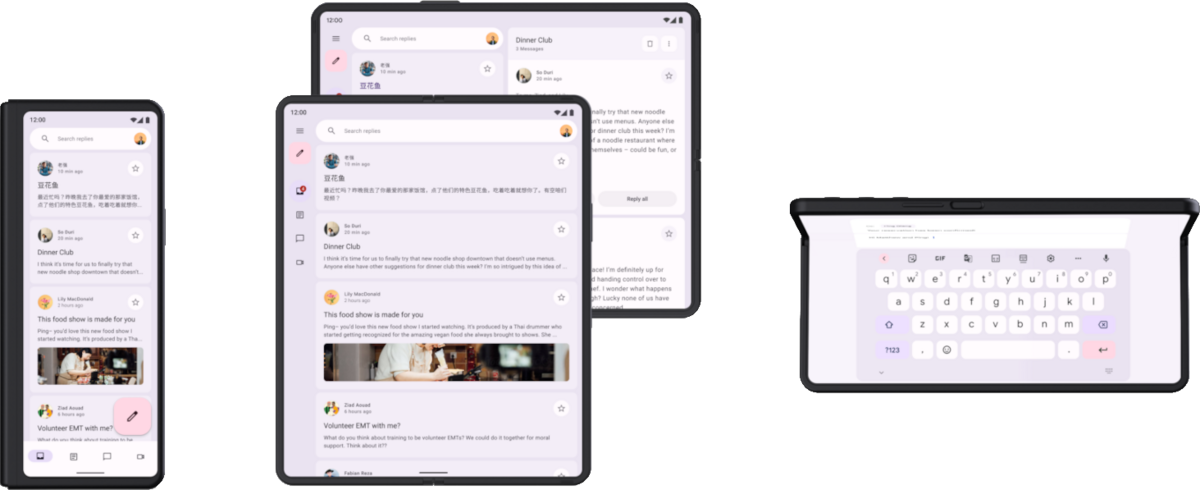
Another trend is apps that work seamlessly with foldable devices.
Foldable devices offer a different layout than a traditional flat screen, which introduces new challenges but also makes innovative user interfaces possible.
For instance, you can adopt a laptop-like interface when the device is folded in an L-shape, like below:
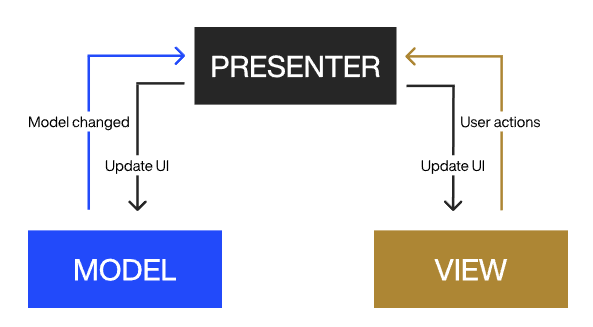
The main benefit of the MVP architecture is its simplicity and modularity. You can easily swap or edit the View controller without affecting the other two components.
While popular, the MVP isn’t the only architecture available. Check out this article for an overview of others you can try.
Optimize your app without sacrificing quality
Ensuring that your app has the best performance possible is key to making it enjoyable to use. After all, who wants to use an app that takes minutes to load?
However, it would be best to balance this quest for efficiency with quality.
You don’t want to make your app run faster at the expense of removing core features or making your UI a pain to use.
For instance, if an animated navigation bar is slowing your app down while still making it easier to navigate, the better solution might be to find a faster alternative instead of eliminating it outright.
You can monitor your Android app with some key performance metrics.
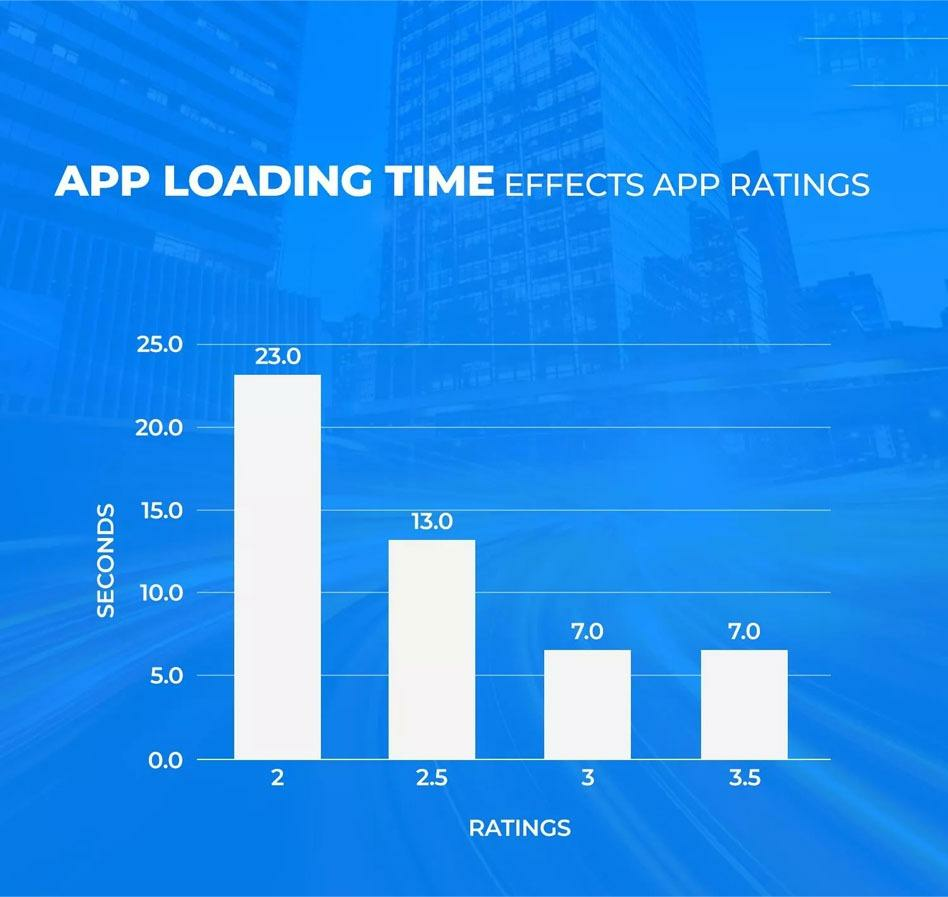
The best place to start would be the loading time because it has the biggest impact on ratings, as the following data shows:
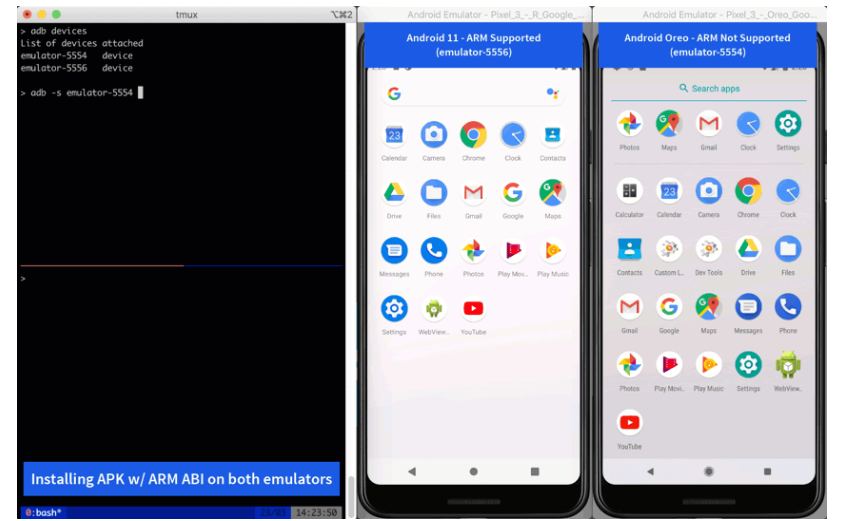
This is a program that allows you to simulate a variety of Android devices, including their hardware specs and resolution. You can then run your apps on them and see how they perform.
You can even run two virtual devices simultaneously and have them interact using Bluetooth. This is useful for testing features that rely on connectivity.
The benefit of an emulator is that you don’t need to obtain physical devices, which could be an added expense during development.
Plus, installing your app to each device before testing would be tedious and time-consuming.
Of course, you can test everything using just an emulator. For instance, you can’t evaluate gestures or holding positions.
Thus, getting an actual physical device to test your device is still useful.
You can do this as a pre-launch routine to ensure your app will be 100% compatible with as many devices as possible.
Test your app on low-end mobile devices
In the last section, we mentioned the merits of testing your app on various devices to combat fragmentation and ensure compatibility.
Adding to this, it’s also crucial to conduct testing on the lowest-end device you plan to launch your app on.
The logic is that if you can optimize your app to run well on slower devices, then it should perform flawlessly on newer ones.
This is important if you want to improve the reach of your mobile app. People in poorer, developing countries tend to have older phones with lower specs.
Testing for those devices is crucial if you want to tap into that market.
Doing so is especially vital for resource-intensive apps like 3D games. That way, you can figure out the lowest specifications you can go for without sacrificing the integrity of your game.
Put effort into properly debugging your app
Testing and debugging is the most critical app development phase, so you should prioritize it. Letting even a single fatal bug get into your app on launch could cause it to fail.
Fortunately, Android’s native integrated development environment (IDE), Android Studio, provides plenty of debugging tools to streamline the process.
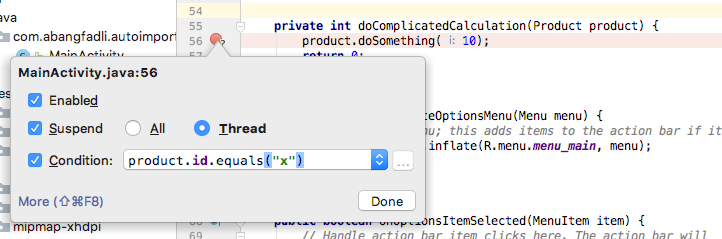
One such feature is the breakpoint.
This allows you to place points in your code where it will stop during runtime, allowing you to inspect the variables, methods, and other things in your code at that state.
You can even add conditions to a breakpoint that will only execute when that particular condition is met:
Android Studio also allows you to change the value of a variable during runtime without having to stop and recompile the code.
This is useful for quickly evaluating how your code runs in certain conditions, or testing if your error-catching routines are effective.
You can also rely on automated testing tools like Appium and Selenium to help you find more bugs in shorter periods.
Ask for and listen to user feedback
An app exists for only one thing—to satisfy the needs of its end users. Hence, the best way to improve an app is to get and listen to their feedback.
Android users are a goldmine of information. They can tell you exactly what’s wrong with your app, the best way to improve it, and the features you should include.
There are many ways to get this feedback. One is encouraging users to leave reviews and feedback on your app store page via an in-app pop-up.
You can even sweeten the pot by providing incentives.