Out-Of-the-box mobile app solutions
Recognized as a top mobile development specialist.
Remember the Segway?
On paper, the concept sounded fantastic. It was supposed to be a revolutionary product that promised to solve mobility issues for many people. The Segway got plenty of publicity and was backed up by massive funding.
However, it ended up becoming a flop.
Why?
A combination of poor execution, high prices, and a bad user experience generally led to its downfall.
Their biggest mistake was to keep the entire thing under wraps until launch.
Had the company released an early version for the public to test, they would’ve discovered that people didn’t like the dorky, impractical design.
They could’ve then refined the concept further, and the Segway might have become a massive success.
That’s the power of prototyping. The same principle applies to app design.
Table of Contents
A prototype is an interactive mockup of a mobile app. It contains key user interfaces, screens, and simulated functions without any working code or final design elements.
Compared to a static wireframe or mockup, you can use a prototype just like any other app.
Nevertheless, because it only simulates features, it’s not as well-developed as a minimum viable product (MVP).
Prototypes allow you to gather better feedback on your app’s usability and functionalities early on.
You then use the insights to either refine or remove features and UI elements before you commit expensive resources and development time on them.
Thus, for a prototype to be effective, it must cost as little time, money, and effort as possible.

Skip the costly set-up of an in-house team and get straight to the talent.
The prototyping process was taken from the manufacturing and design world, specifically Computer-Aided Design (CAD).
The concept is also similar to a storyboard in film or blueprints in architecture.
Prototypes are valuable validation and testing tools that allow you to verify the feasibility of your app concept. In addition, there are other benefits you can look forward to.
Let’s look at what prototyping does for your app.
One of the hardest things to get right in an app is the user experience (UX). Even a tech giant like Google gets it wrong occasionally.
Fortunately, prototyping is exceptional at getting UX insights. Because actual users are testing your app, you’ll get much more accurate feedback on your UI.
Is the color scheme working? Can users intuitively find their way around the app? Is using two screens for a particular feature better than using just one?
These are some of the many questions that prototyping can answer. With a rich set of live data to draw from, the work of the UX and UI designer relies less on guesswork and more on sound research.
Prototyping also allows you to compare two or more variations on the app’s interface more accurately.
Can’t decide if your navigation menu should be at the right or bottom of the screen? Test them out using two prototypes and see which one users like best.
Prototyping isn’t just a great testing tool but a great project road map as well.
It gives you a visual tool to communicate your app’s design, flow, and function.
Features and elements are less open to interpretation, which reduces errors and miscommunications significantly.
A prototype also gets people involved.
Everyone in the development team, and even vendors and clients, can chip in with their suggestions. Your app benefits from different perspectives, making it much more well-rounded.
One of the most significant time and money sinks on any development project is the reworks and revisions on the finished app.
Most of the time, these are caused by features or the user experience not meeting expectations during acceptance testing.
These revisions are generally hard to avoid. Even if you make sound assumptions during the planning stage, that’s still all they are—assumptions.
Prototyping, however, can test these assumptions against the users themselves. You can identify potential issues better and thus fix them earlier in the development process.
The result? Minimal or zero revisions. This can help you estimate your costs by up to 50% better and reduce post-launch fixes by 25%, according to an anecdote by UX expert Todd Zaki Warfel.
The best part is that the prototype can become the foundation for the final app version, further cutting development time.
Creating a prototype is much like developing the app itself. It starts with having a solid goal and the features you want to include in mind.
Prototyping is all about testing the core functionalities of your app, so your first step is to identify what these are.
Much like when designing an onboarding sequence, your prototype should focus on the app features that are essential, innovative, and highly relevant to your users.
These are the things that you’ll spend the most time simulating or fleshing out in the prototype.
This step is important because, remember, the whole point of a prototype is to develop a testable mockup of your app rapidly.
If you have dozens of features, it’ll take more time to implement them. Not to mention, it can overwhelm or confuse users, leading to less than accurate insights.
Admittedly, there’s no easy way to pick which features to include in your prototype.
It all comes down to the goals of your app. Always refer to them so you can filter through which features best meet those goals.
Brainstorms, interviews, and surveys with your target market can also help.
If you really can’t decide between two or more similar features, it might be worth doing multiple prototypes for them. Split test each, and see which ones users resonate with the most.
Once you’ve decided on the features you want to include, it’s time to sketch out your app idea on paper.
The sketch, also called a low-fidelity wireframe, should include the main screens of your app, with the initial layout showing the user interface elements you plan to use.
You then use arrows to indicate how they flow from screen to screen.
For example, if you’re prototyping an e-commerce app, you might sketch out a rough layout of the product screen.
You can draw placeholders for the product image and buttons, including the “Checkout” button.
You then show what happens when a user taps on that button by drawing an arrow from it to the checkout screen.
At this point, you don’t need to worry about colors or design. You don’t even need special tools.
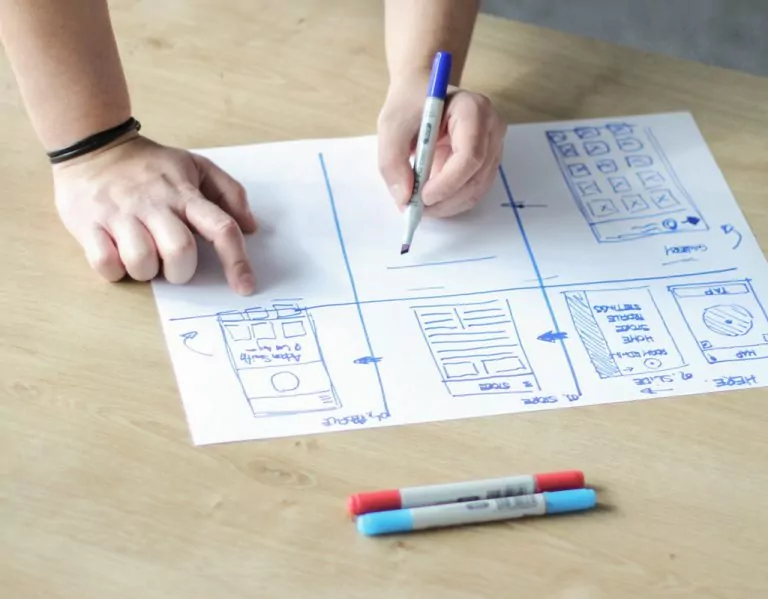
Remember, this is just a rough visualization of your prototype, so don’t go too much into details.
The advantage of a low-fidelity wireframe is that anyone can do it to communicate app ideas quickly, gather feedback, and revise just as rapidly.
Once you’re happy with your sketch, it’s time to flesh it out into a proper prototype.
In this step, you’ll translate the paper wireframe you did into a digital, working prototype using various tools.
First, build the app screens based on your wireframe sketch.
You can further refine the user interface by adding UI elements like buttons and text fields. You can try playing around with colors too, but that’s not required at this point.
Fortunately, most prototype tools have a rich library of common iOS and Android UI elements, so you should be able to build a professional-looking app prototype fairly quickly.
Once you have the look of your app nailed down, you then add in animations and pre-programmed interactions to make it come to life.
Note that you generally won’t code anything at this point—most of what users experience in your prototype is just a simulation.

Low fidelity wireframe vs Mid fidelity wireframe vs Prototype
In our e-commerce example, you can make the product screen change to the checkout screen when the user taps on the “Checkout” button.
You can even put pretend price calculations or mock product photos to provide a better simulation.
It’s easy to go overboard at this stage, as there’s always the temptation to spend too much time building your prototype. Resist the urge as best you can!
[bctt tweet=”Remember that the goal isn’t to make the perfect prototype but a “good enough” version that you can rapidly test.”]
This is where setting a strict deadline for your prototyping is beneficial (or try out the time-intensive Design Sprint method, which we’ll discuss later).
With a ready prototype on hand, it’s time to put it into action. Encourage as many people as you can to use it, so you can get the most diverse feedback possible.
The easiest and first users to test it with are your colleagues.
Don’t just include members of the development team. Share it with people from HR, accounting, and marketing. You can also have friends and family as testers.
But by far, the most crucial group to test it with are the end-users of your app.
Regardless of who tests your prototype, your goal at this stage is to get as much input as possible.

Source: Figma
There are many ways to do this, from asking for surveys to recording them while using the app.
Nevertheless, if your app supports it, the easiest would be to collect live data as your users are testing. Some tools, like Invision, also allow users to comment from within the app prototype.
Once you’ve gathered substantial feedback, you’ll refine your prototype to address pain points and issues with your app.
Test the prototype again, with either the same or a different set of users, and gather more feedback.
Rinse and repeat until you’ve arrived at a pre-final prototype you’re happy with.
A prototype is an incredibly effective way to get buy-in from key shareholders, namely your clients, investors, or upper management.
After all, it’s as close as you can get to what the final app will look like and how it will function.
However, it’s not enough to simply send them a link to the prototype; in fact, it’s best that you don’t do this at all.
Instead, you should schedule a presentation and walk stakeholders through the app prototype in person.
Because you have plenty of feedback from the iterations of testing you did, everything in your app is backed by solid evidence.
If a client questions your design decisions, for example, you can always show data that proves users preferred it over everything else.
It might also be worthwhile to polish your prototype and make it look more presentable to stakeholders at this stage.
You can get a graphic designer to create elements for the prototype or even use code to implement advanced features.
Creating a prototype will require a few standard tools of the trade, much like how a carpenter needs a sturdy hammer to work.
Tools can make prototyping much faster and easier. While there are some powerful but expensive tools out there, you’ll be surprised how some of them are cheap or even free.
The first group of tools you’ll need are the tools for designing app wireframes and mockups.
As we explained in the above section, you can get away with just using paper or a whiteboard for this purpose.
However, if you prefer digital tools, we recommend using Sketch. This mainstay of the UX/UI design community features tools and plug-ins specific to wireframing app interfaces quickly.
Source: Sketch
Sketching tools can quickly help you create mockups, but they don’t allow you to add interactive elements and animations. To bring your designs to life, you’ll need dedicated prototyping tools.
One of the more robust prototyping tools is Proto.io, a platform dedicated to mobile apps and simulations.
Alternatively, you can go for wireframing software that supports limited animations, such as Balsamiq and UXPin.
Whichever platform you pick, it’s vital that the tool is meeting your team’s prototyping requirements. We’ll talk about the features to look for in the next section.
The most important thing to remember with prototyping tools is that they should allow you to create a robust app prototype quickly and easily.
Here are some of the features you need to help you achieve that:
Prototyping tools should be easy to use and intuitive, even if you don’t have design experience.
Spending several hours to learn how to use one can add unnecessary time to the process, which is counter to what a prototype should be.
Robust design tools are crucial with any prototyping software. It’s beneficial for both novices (to minimize design mistakes) and experts (to speed up their workflow) alike.
You should also look for prototyping platforms that work well with other graphics software like Photoshop and Sketch.
This makes it possible to work with designers who may be more comfortable with these platforms.
Templates are vital to speed up the prototyping process because you don’t need to create layouts from scratch. They’re great for inspiration as well if you find yourself short on ideas.
What’s more, most of these templates are based on proven designs, which means you’re starting the prototype on a great foundation.
The ability to add animations and interactions is what separates a prototyping tool from wireframing software.
In particular, the tools should be able to simulate all actions that a user can do in an app, such as tapping, swiping, and pinching.
Look for a tool that lets you create an app prototype once and then deploy it on iOS and Android.
This helps you save time if you’re developing cross-platform apps.
A Design Sprint is a structured, rapid prototyping method that can validate app ideas in as little as five days.
Here’s an overview of how it works.
As you can see, the schedule is pretty tight and gives you barely enough time to finish each stage. But that’s the beauty of this method.
The idea behind Design Spring is not to create a full working prototype—that’s impossible with the timeframe.
Instead, you build and test just the minimum to answer the most critical question: “Is this app idea worth pursuing?”
The power of Design Sprint is that it compresses months-long meetings, brainstorming sessions, and prototyping into a single workweek.
This forces teams to focus on only the things that matter, eliminating procrastination and yielding insights far more quickly.
While Design Sprints can be effective, they are challenging to implement. It’s easy for the team to go astray during the process, so an experienced facilitator is required.
The whole five days is also very intensive and draining for both the team and the company.
But if you pull it off, Design Sprints can help you arrive at a killer app idea faster than you ever imagined.
Prototyping used to be an optional part of development. Now, it’s a fundamental ingredient for app success.
The process can deliver real-world insights that you’ll rarely discover through planning and assumptions alone.
Paired with a rigorous testing regimen, prototyping ensures that your app meets users’ and clients’ expectations.
We hope this post has inspired you to try out prototyping on your next project. Or, if you need more help and advice, why not give us a call?

Marko started DECODE with co-founders Peter and Mario, and a decade later, leads the company as CEO. His role is now almost entirely centred around business strategy, though his extensive background in software engineering makes sure he sees the future of the company from every angle. A graduate of the University of Zagreb’s Faculty of Electrical Engineering and Computing, he’s fascinated by the architecture of mobile apps and reactive programming, and a strong believer in life-long learning. Always ready for action. Or an impromptu skiing trip.
Recognized as a top mobile development specialist.

There are certain processes and trends you must keep abreast of if you want to successfully turn your app idea into reality.

If you want to get users excited about your creation, you must put a great deal of work into its marketing. Follow our tips to attract all the consumers you want.