
Top 8 iOS app development trends to watch out for
Stay ahead in the competitive world of iOS app development with these top 8 trends to watch out for.
Coordinating the collaboration between multiple developers is probably the most challenging aspect of app development.
Different working styles, experiences, coding methods, and skill sets aren’t always compatible with each other.
And these can create friction within the team, hindering effective teamwork and slowing progress.
Fortunately, there are strategies you can use that can help facilitate effective collaboration in app development. And in this article, we present seven of our best ones.
One of the best ways to make development easy for your developers is to let them follow a single coding style.
A coding style is the set of guidelines and best practices that govern how developers write code.
This covers syntax, naming conventions, formatting, and even conventions on when to comment code.
Here’s an example:
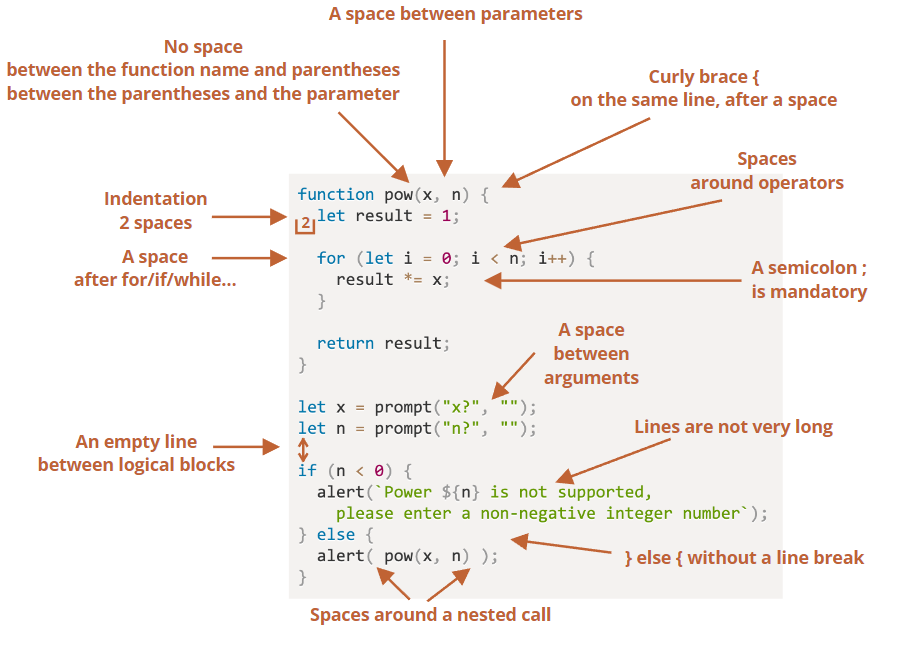
Source: Javascript.info
Some people would dismiss these details as trivial, but they play an incredibly critical role in app development.
A consistent coding style helps make code easy to read and understand for other developers, leading to faster development and troubleshooting.
Take naming variables, for example.
If a variable was simply named X, it would be nearly impossible to know what it’s for unless you read the rest of the code for context.
That’s a time-consuming and potentially error-prone process.
But contrast it with a variable named redBoxLength. Now, that’s much clearer, isn’t it?
Coding styles help prevent spaghetti code, a phenomenon where a code has no structure and is thus difficult to follow.
Often, this results from multiple developers working on a source code without a standard style.
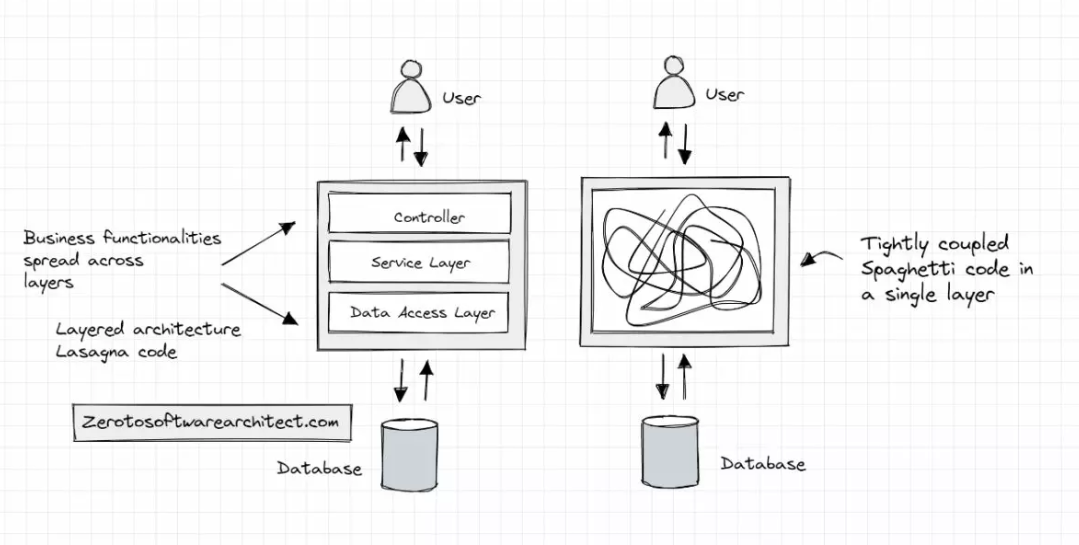
Source: Scale Your App
Fortunately, there’s no need to define your coding style from scratch, as you can follow many excellent guidelines already available.
One resource is Google’s Swift Style Guide. It’s a good place to start because it covers every aspect of coding and is easy to follow.
For example, it specifies that case statements in a switch statement must have the same indentation, while code inside the case blocks must be indented +2.
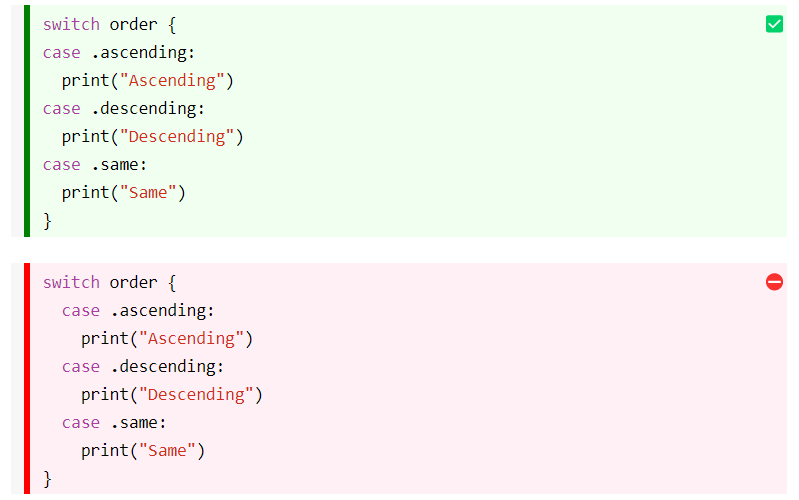
Source: GitHub
The bottom line is that a standard coding style is essential for efficient app development.
The challenge, though, is ensuring every developer complies with the standard. Not easy in practice because most programmers have coding habits that might be hard to break.
But there’s a technique that might help you here—automatic code styling.
Many modern integrated development environments (IDEs) have auto-formatting features, automatically reformatting the code to comply with a standard coding style and best practices.
This is often done with a Linter. It’s a tool that analyzes your source code for any issues and attempts to optimize it.
Originally built to detect potential bugs before compiling, it eventually evolved to check for styling errors as well.
For Swift, you have the Swift lint, which checks if the source code complies with the Google Swift Style Guide.
Here’s an example of how it works. Notice that it generates warnings when a styling rule is broken.
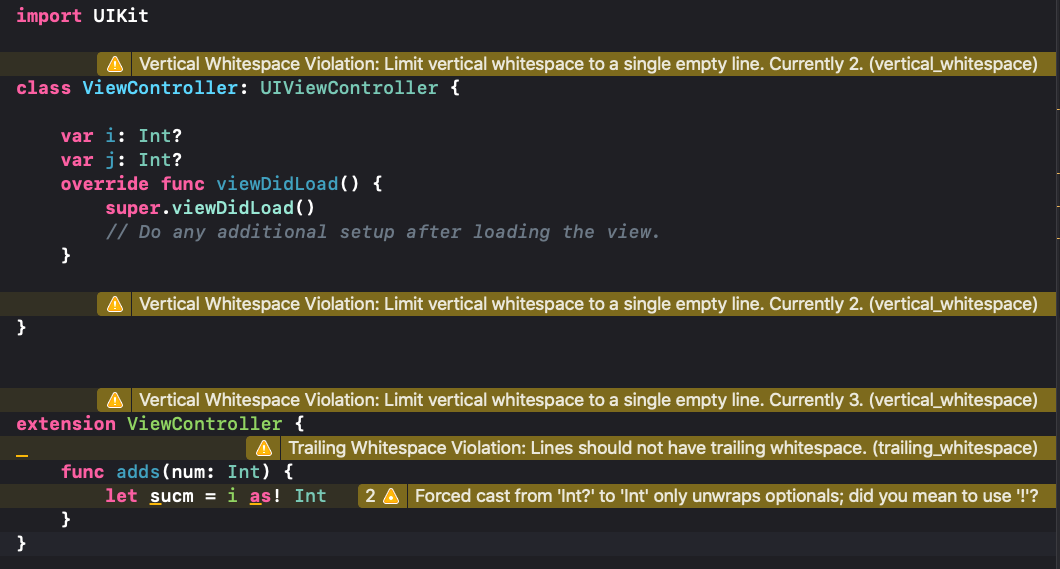
Source: Mobikul
By default, a linter only issues warnings like these and will not modify the code for you. If you want that capability, you need a formatter instead.
A formatter will both find and fix styling convention violations. In Swift lint, you can enable this by using the autocorrect command when integrating the tool into Xcode.
You can also use a stand-alone formatter like SwiftFormat as an alternative.
Both tools are fantastic if you have a development team with wildly different coding styles. It reduces the learning curve required to adapt to a universal style.
However, a linter or formatter should not be a replacement for actually learning the coding style itself. Consider it a safety net when your team is still adjusting to a new style guideline.
Nowadays, writing code is easier because you don’t have to write most functionality from scratch.
You can simply download a third-party library and add it to your app with just a few lines.
For instance, you can greatly simplify network tasks using Alamofire.
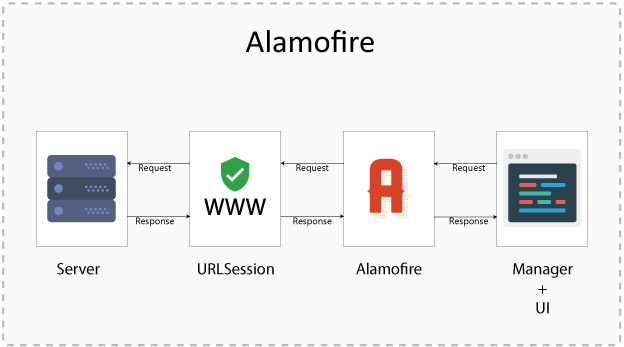
Source: Innovation M
However, there are several dangers in relying too much on these third-party libraries.
One is that these dependencies might cause problems for the app in the future.
For example, an open-source tool you used might become incompatible with a future release of iOS.
Or worse, the library developer might accidentally introduce a mistake that could take down your app.
This happened in 2016 with a widely used open-source Javascript package.
The creator accidentally deleted 11 lines of code, which disrupted hundreds of apps and websites using the package.
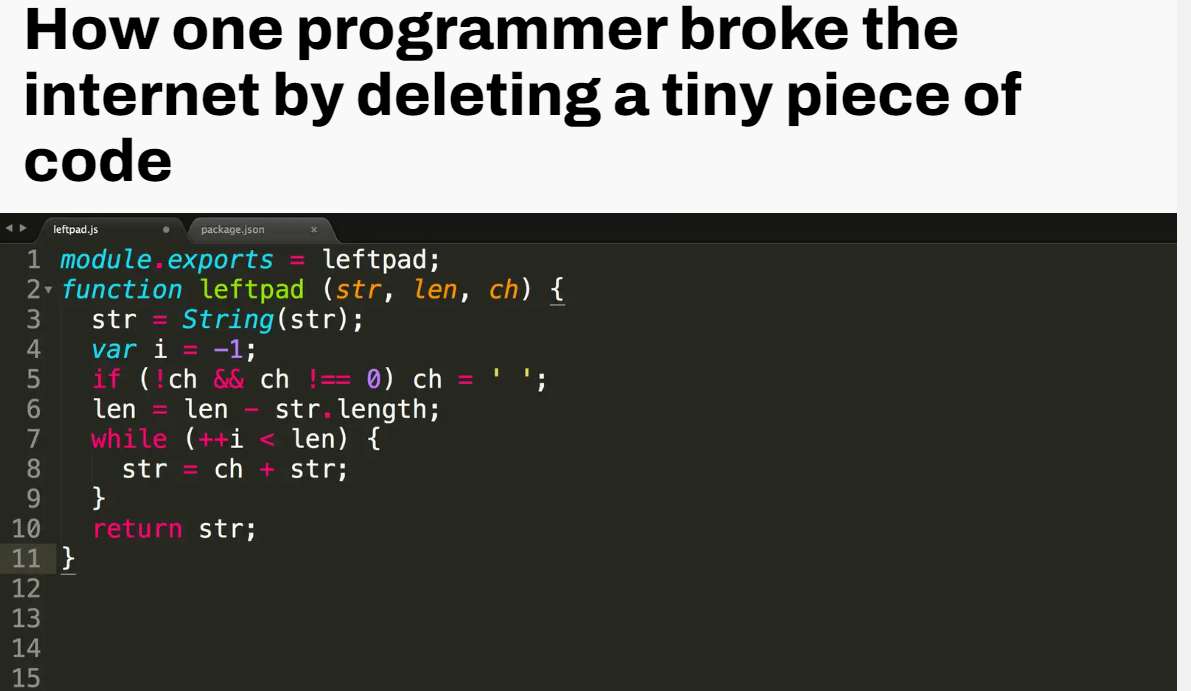
Source: QZ
Third-party libraries can also introduce vulnerabilities that could threaten your app’s security. While it’s relatively uncommon, it has happened quite a few times that you should take notice.
A recent example is the vulnerability discovered in Apache Log4j, which allowed a hacker to execute code remotely in the software.
Because of this, the best approach is to use third-party libraries merely as inspiration and reference to write your own code.
If you absolutely need to use libraries and tools, and you’re developing iOS apps, it’s best to stick with those released by Apple, as you’re guaranteed better compatibility and support if something goes wrong.
Also, try to limit third-party libraries to non-core functionalities so it doesn’t impact your app even if they go under.
Git is an open-source platform that allows you to manage different versions of the source code.
It does this by tracking all changes made in a source file and recording it as a branch in the repository. That allows you to return to any previous code version if needed.
But the real power of Git enables multiple developers to work on the same source code with an online Git tool such as GitHub.
These changes can then be merged into one final version for production.
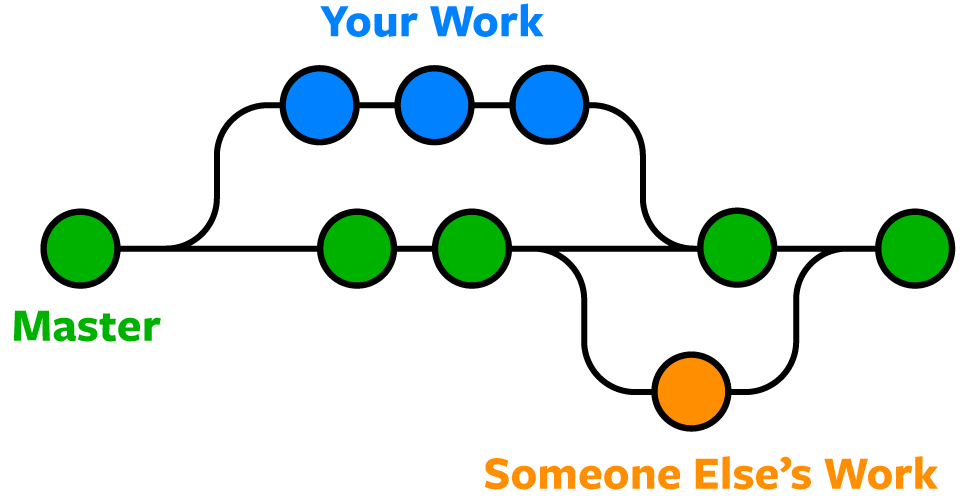
Source: Noble Desktop
GIt makes collaboration possible.
There’s no need to wait for someone else to finish working on the source code before you do, speeding up development dramatically.
It also streamlines troubleshooting and debugging by quickly reverting to a more stable version.
Furthermore, Git creates accountability by showing exactly who worked on what in the project.
Because of this, you should set up your Git repository ASAP, before writing a single line of code.
Fortunately, the process is easy.
Xcode provides Git capabilities natively through its Source Control feature.
With it, you can easily store source code versions on your computer as you write them without installing any third-party tool.
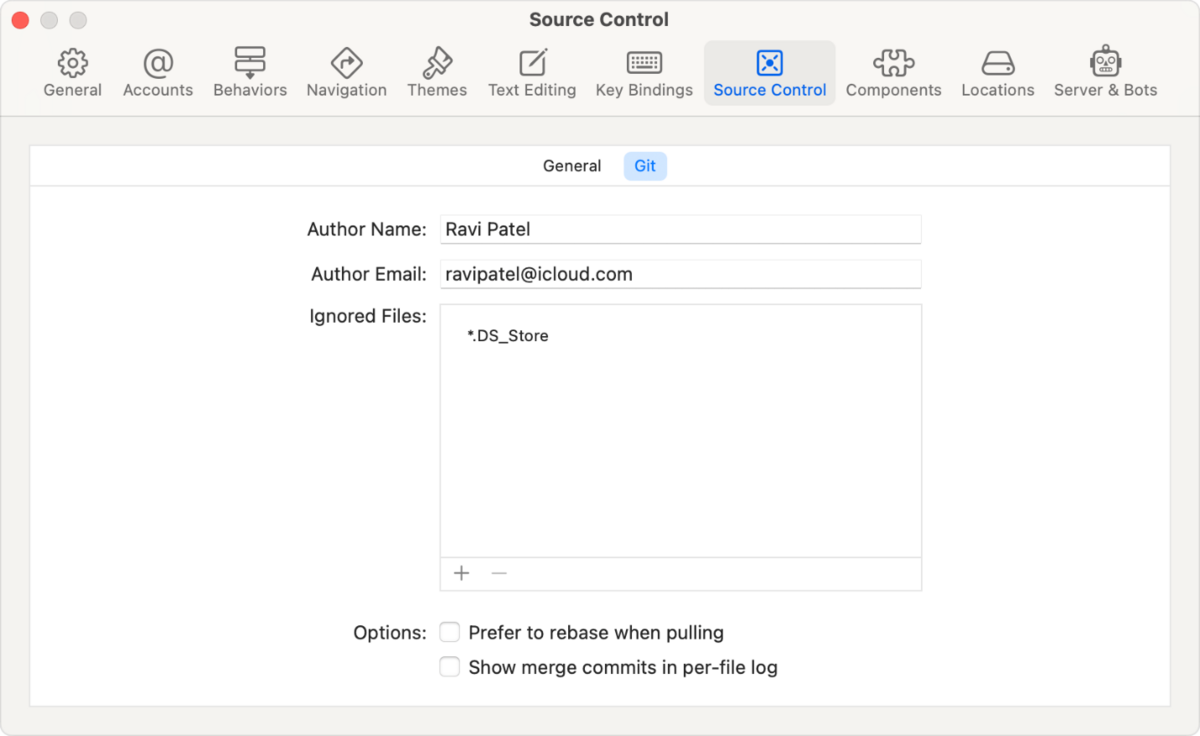
Source: Apple
However, it’s much better for a team to have a centralized repository that provides version control capabilities online.
This makes sharing code versions easier for everyone on the team, especially if you have remote members.
Refactoring is the process of revising the code without changing its functionality.
This is often done to improve the code by making it more readable and easier to understand.
It can also make the code easier to modify and maintain, mostly by separating a monolithic code into separate components or layers.
Here’s a simple example of refactoring:
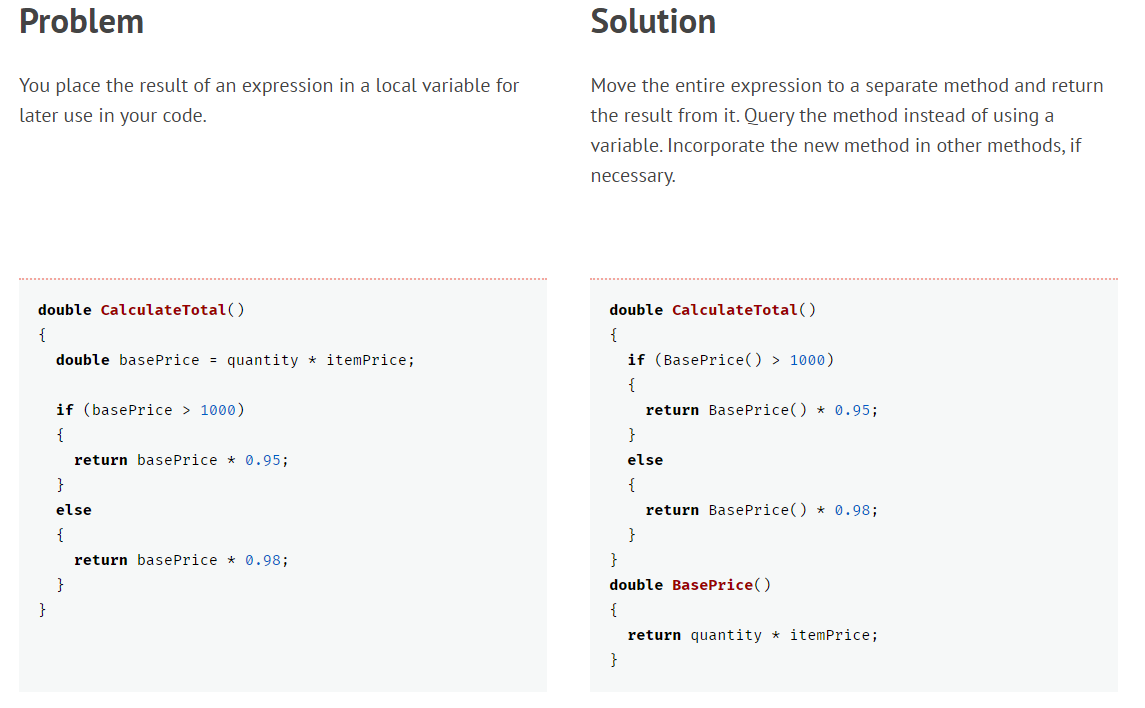
Source: Refactoring Guru
This is a classic refactoring method of putting a piece of code into its own function. This allows the developer to reuse that functionality in other areas of the code without having to rewrite it.
Sometimes, refactoring can even make the code more efficient by eliminating redundant lines that could slow it down.
This study shows that refactored code can improve internal metrics for performance:

Source: Semantic Scholar
Refactoring seems like a lot of work—and it is. But the good news is that you can leverage Xcode’s built-in refactoring tools to simplify the task.
For example, you can use the Extract to Method feature to automatically separate a chunk of code into a function block. Xcode will also include any parameter references.
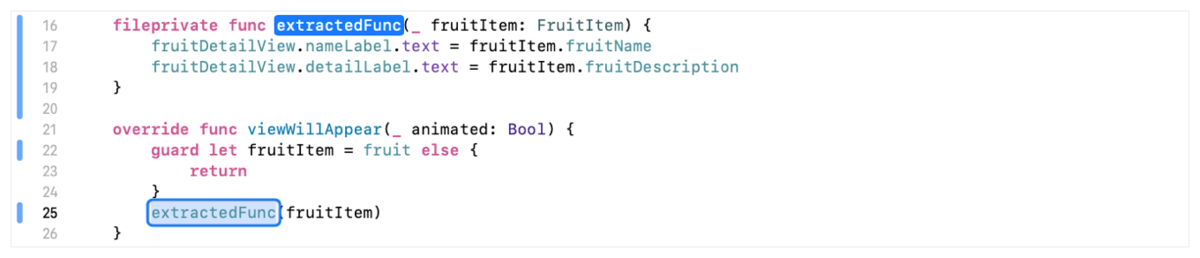
Source: Apple
Xcode also provides powerful editing tools that allow you to revise your code quickly and efficiently.
For example, you can use multi-cursor editing to refactor multiple variables simultaneously.
You can also easily expand Switch statements, rename all variable instances in a single file, and search for names or symbols project-wide.
Xcode’s refactoring tools are easy to use, plus they make sure you cover every nook and cranny of your code. There really is no reason not to use them.
Monitoring app crashes shouldn’t be done near the end of development. Instead, it should be a part of your process from the beginning.
Crashes are a tell-tale sign that something’s wrong in your code. They could be caused by several things, including poor memory management, a critical error, or a network issue.
Detecting them early is beneficial because they’re cheaper and easier to fix according to the 1-10-100 Rule.
If you find that your app is prone to crashes only after you launch, it’ll cost you 100X more to rectify.
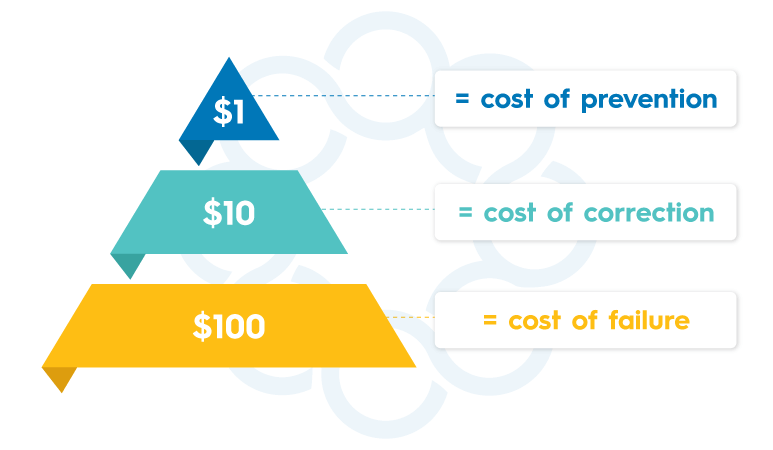
Source: Inspectorio
Monitoring crashes throughout development will let you create a safer app that delivers an excellent user experience.
And there are plenty of crash and monitoring tools that can simplify this process for you.
These can continuously evaluate your app in the background as you code and alert you if a crash occurs.
One example is Raygun, a crash reporting tool compatible with over 30 programming languages and platforms, including iOS.
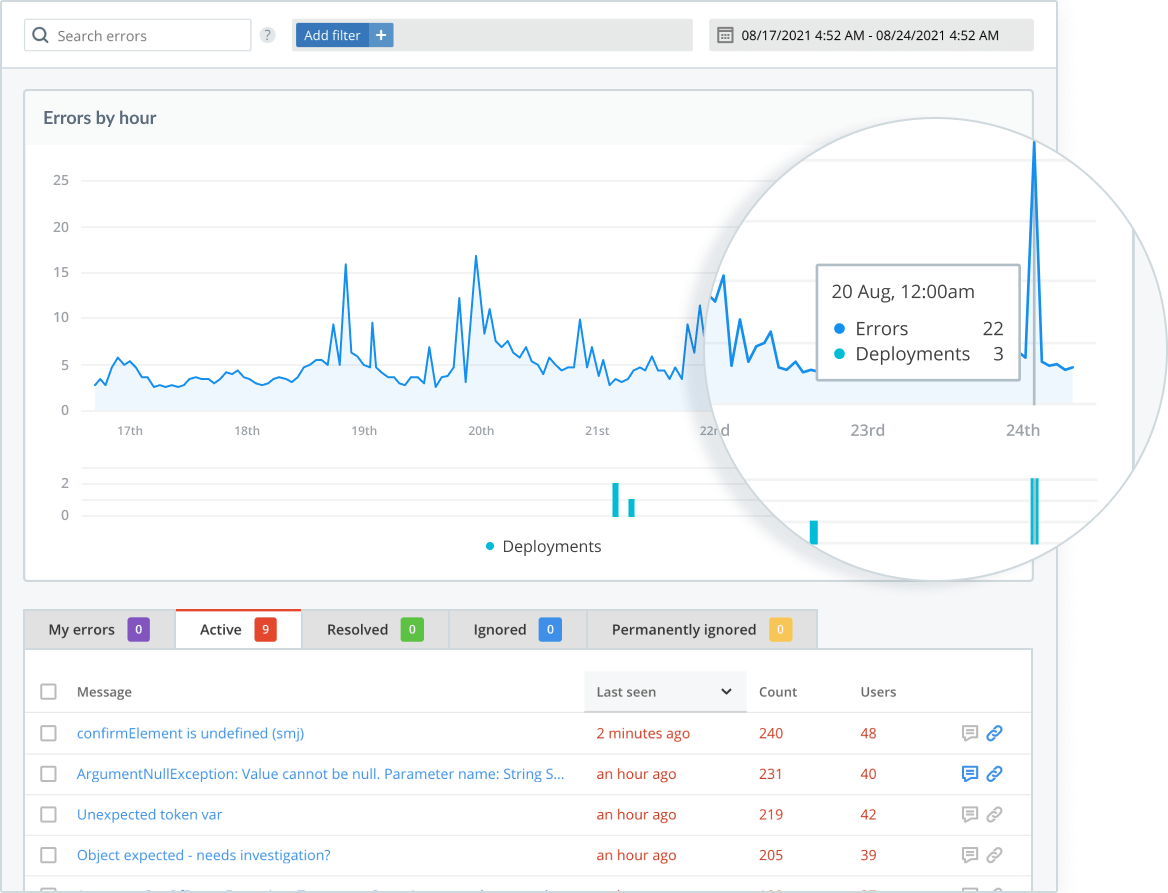
Source: Raygun
Raygun gives you comprehensive details about a crash, allowing you to pinpoint and fix the cause much more easily.
Plus, it also has several analytics features that make it more than just a reporting tool.
For example, it can track the number of errors that occurred in a given period.
This is useful for extracting productivity metrics to monitor your team, such as mean time between failures (MTBF) and code review.
Partnering with an iOS development agency can be one of the best decisions you’ll ever make. A highly skilled and reliable team can bring any app idea to life, no matter how complex.
An agency can get you started on your project quickly without much effort. There’s no need to go through a time-consuming hiring process and invest in equipment.
And, in some cases, it can even lower development costs.
However, you need to pick the right team for this to happen, which is why you need a stringent hiring process.
But what does a good partner look like? Here are the traits we think they should possess.
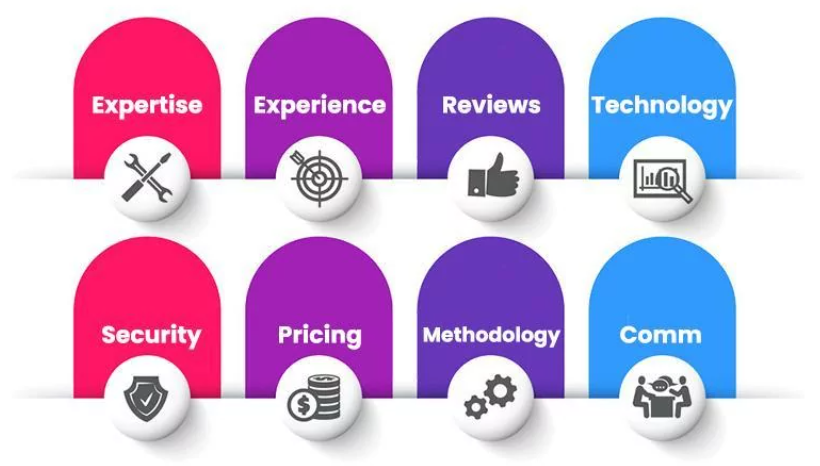
Source: DECODE
Using the above criteria as a guide, start researching the vendor market to look for potential candidates. A good website to do this is Clutch or Glassdoor.
Pay close attention to their portfolio, case studies, and testimonials, as these will give you the best indication of their expertise, experience, and work ethic.
Once you’ve shortlisted a few agencies, it’s time to interview them to gauge if they fit your project.
If you’re stumped on how to do this, we’ve prepared ten questions you should ask before hiring a software agency.
And if you still don’t know where to start searching for the right agency, why not consider DECODE?
The DECODE team has created dozens of successful iOS app projects in multiple niches, so we have the expertise and experience.
But where we truly shine is in the level of service we provide.
Working with DECODE feels like working with your own in-house team, not just a third-party contractor.
That’s because we adapt to your needs, from signing a non-disclosure agreement to giving you full ownership of the code.
Our ethos is to make our partnership feel effortless so that we can focus on your project’s goals.
Launching an iOS app means facing the App Store’s rigorous vetting process, so it’s important to implement only the best development practices.
Therefore, it’s important to implement the best development practices.
The seven tips we’ve listed here aim to help you with this.
And if you want your final product to be up to the highest standards, why not hire an agency like DECODE, which has experience with creating a variety of apps?
Interested? Schedule a consultation with us today, and let’s talk about your project!

Skilled in React Native, iOS and backend, Toni has a demonstrated knowledge of the information technology and services industry, with plenty of hands-on experience to back it up. He’s also an experienced Cloud engineer in Amazon Web Services (AWS), passionate about leveraging cloud technologies to improve the agility and efficiency of businesses. One of Toni’s most special traits is his talent for online shopping. In fact, our delivery guy is convinced that ‘Toni Vujević’ is a pseudonym for all DECODErs.
Stay ahead in the competitive world of iOS app development with these top 8 trends to watch out for.

In this article, we'll explain the key differences between iOS and Android app development.

Creating applications for Apple products is exciting, challenging but very rewarding.