Constraint Layout became popular among Android developers the very instant that it was first introduced.
Since then, Google has made several improvements over time and now, since August 21st, Constraint Layout 2.0.0 stable release is available. And it has introduced two new cool views for Android developers to play with.
This article will try to show basic problems that Flow and Layer view can solve, covering some of the basic properties of those views, with simple code examples.
When a newer version of ConstraintLayout becomes available, those properties might change, as well as the final outcome of your layout.
Nevertheless, this should be a good starting point when getting familiar with those new views. So, let’s start then!
If we are starting with new project, add dependencies in the build.gradle file for your app module with current latest version of Constraint Layout:
dependencies {
    implementation "androidx.constraintlayout:constraintlayout:2.0.4"
}
and you are ready to explore what’s new in the Constraint Layout 2.0. If you already have a project with ConstraintLayout dependency in it, you just need to update version to (currently latest available) 2.0.4, and we are ready to go.
Flow
Flow is the first of the two new views available in Constraint Layout 2.0. It is a virtual layout that helps build chains that can wrap to the next line.
Since it is a virtual layout, it does not add levels to your layout hierarchy. It just references other views in the ConstraintLayout that need to be aligned and wrapped into the next line.
Let’s take a look at an example of the layout with Flow. As a starting point, we will create following layout with 5 TextViews:
<androidx.constraintlayout.widget.ConstraintLayout xmlns:android="http://schemas.android.com/apk/res/android"
   xmlns:app="http://schemas.android.com/apk/res-auto"
   xmlns:tools="http://schemas.android.com/tools"
   android:layout_width="match_parent"
   android:layout_height="match_parent"
   android:animateLayoutChanges="true"
   android:padding="20dp">

   <TextView
       android:id="@+id/textView1"
       android:layout_width="100dp"
       android:layout_height="100dp"
       android:background="#0000FF"
       android:gravity="center_horizontal|center_vertical"
       android:text="1"
       android:textAlignment="center"
       android:textColor="#FFFFFF"
       android:textSize="40sp"
       app:layout_constraintLeft_toLeftOf="parent"
       app:layout_constraintTop_toTopOf="parent" />
    <!--
        textView2, textView3, textView4 and textView5 are the same
        only difference is background color and text value
    -->
   <androidx.constraintlayout.helper.widget.Flow
       android:id="@+id/flowView"
       android:layout_width="match_parent"
       android:layout_height="0dp"
       app:constraint_referenced_ids="textView1,textView2,textView3, textView4, textView5"
       app:flow_horizontalGap="10dp"
       app:flow_horizontalStyle="spread"
       app:flow_verticalGap="10dp"
       app:flow_verticalStyle="spread"
       app:flow_wrapMode="none"
       app:layout_constraintBottom_toTopOf="@id/wrapModeText"
       app:layout_constraintLeft_toLeftOf="parent"
       app:layout_constraintRight_toRightOf="parent"
       app:layout_constraintTop_toTopOf="parent" />
</androidx.constraintlayout.widget.ConstraintLayout>
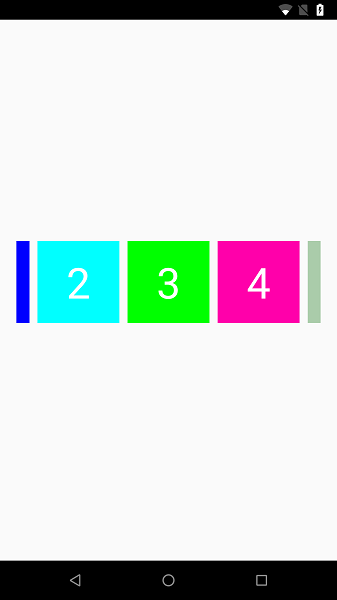
So, nothing fancy here, 5 TextViews, each with 100dp width and height, with different background color, and showing number. However, the last view is Flow, which lists all of those TextViews in its constraint_reference_ids property. And that layout looks like this:
But wait, this doesn’t look nice. That can’t be all!? Nope, it’s not! Now the fun starts!
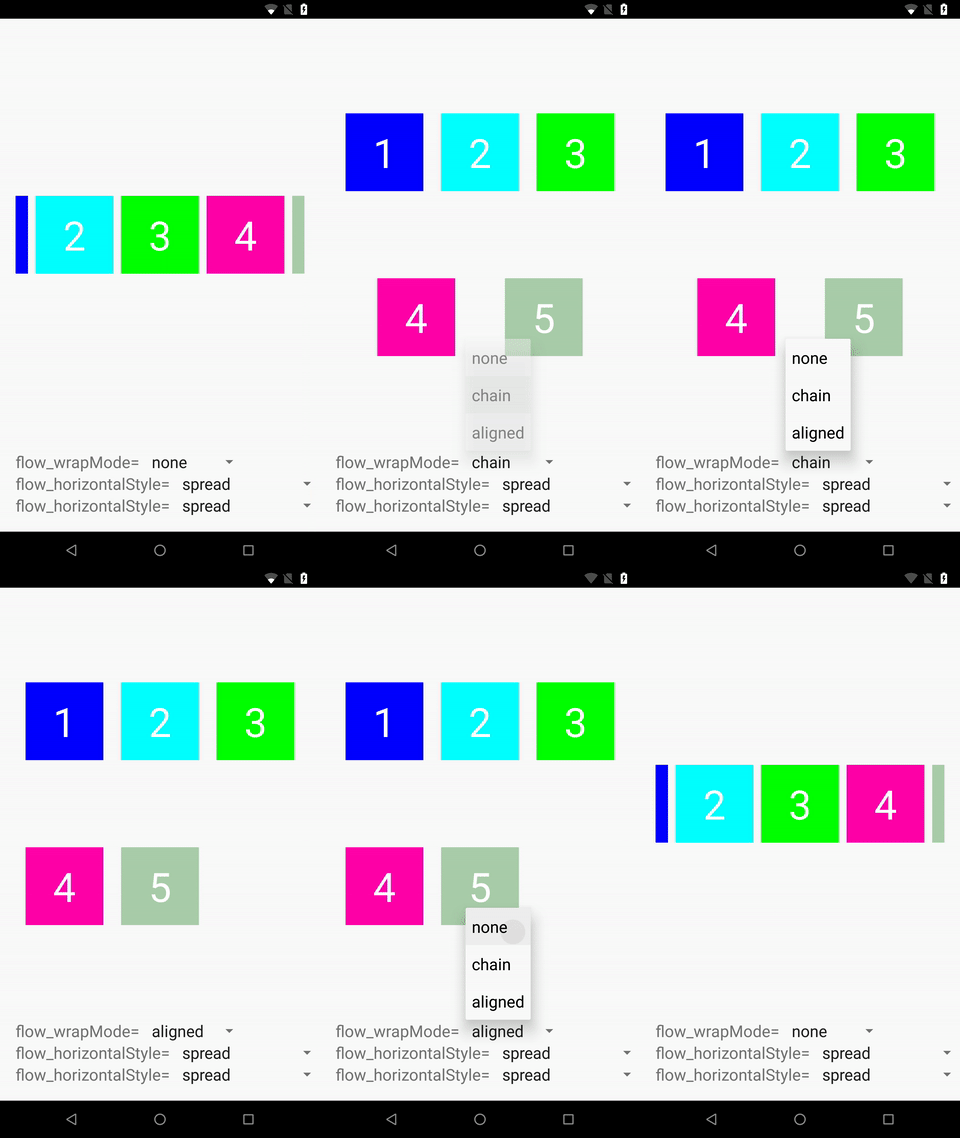
We can change the value of flow_wrapMode property of Flow view and we get this:
As you can see, we can choose between three wrap modes:
- ”none” which creates a horizontal (or vertical, depending on the selected orientation) chain out of referenced views
- ”chain” which also creates a chain out of referenced views, but if the views do not fit vertically or horizontally, (again, depending on picked orientation), they will wrap to the next line (or column if orientation=”vertical”)
- ”aligned”, which is the same as ”chain”, wraps views into the next line/column, and aligns them into columns/lines (again, depending on the selected orientation)
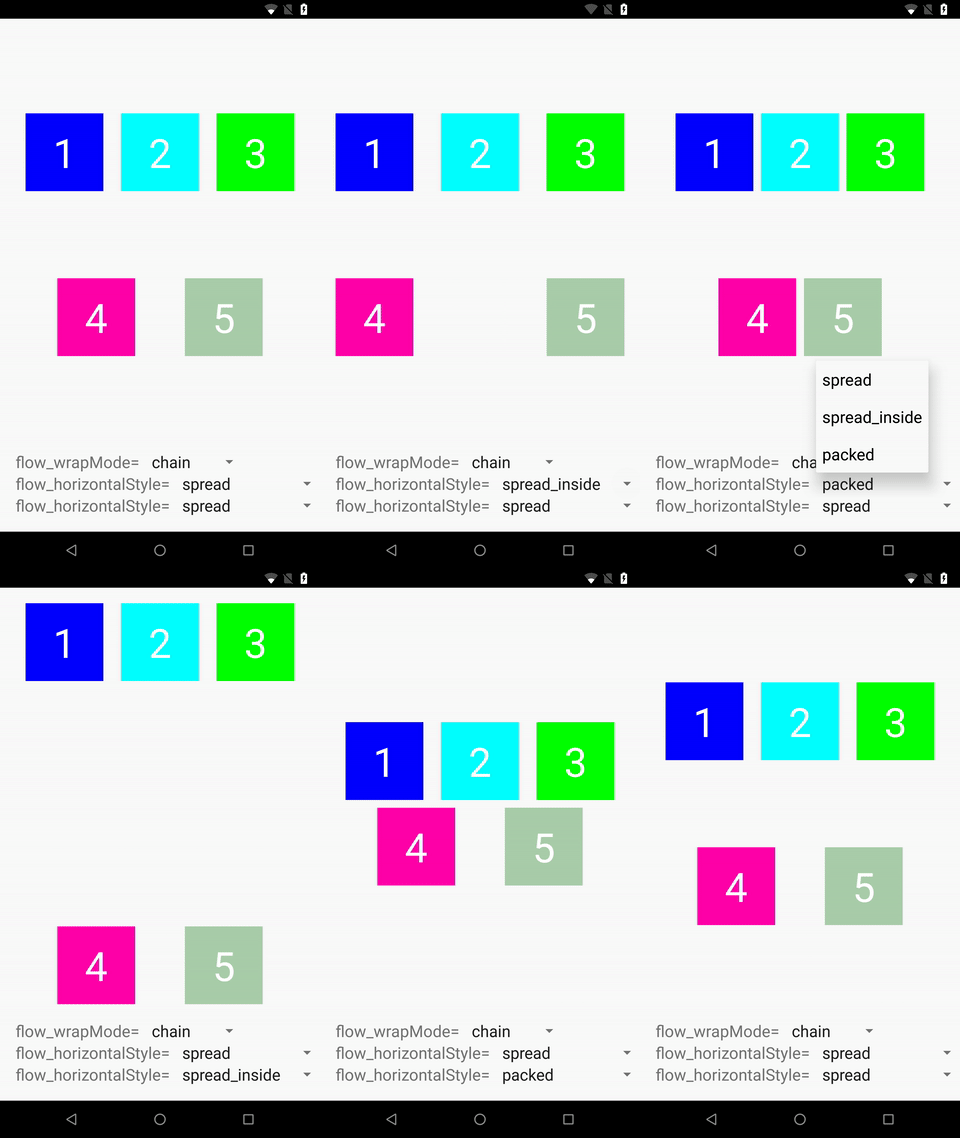
If you need to ensure minimal distance between views, you can set it with flow_horizontalGap and flow_verticalGap properties. Also, there are three styles you can use to set how “free space” between views is used vertically or horizontally.
For more detailed information, please refer to Flow documentation.
Layer
Layer is the second new view available in Constraint Layout 2.0. It is also a virtual layer, but unlike Flow, Layer does not lay views out.
As its name says, it lets us create virtual layers from several views so that we can build animations and apply transitions on all of them at once, as a unit.
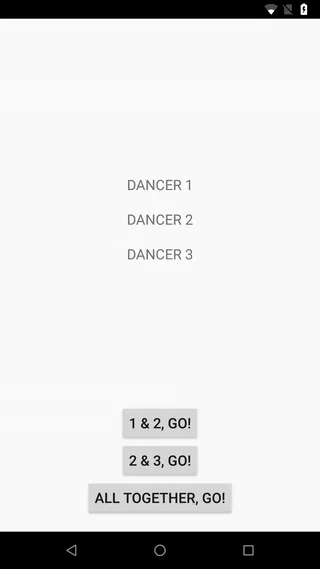
For example, we want to rotate three TextViews by 360 degrees clockwise, like they are dancing together in pairs two by two, and all three together. Let’s name them Dancer 1, Dancer 2 and Dancer 3.
So, we should create a layout for that – something like this:
<?xml version="1.0" encoding="utf-8"?>
<androidx.constraintlayout.widget.ConstraintLayout      xmlns:android="http://schemas.android.com/apk/res/android"
   xmlns:app="http://schemas.android.com/apk/res-auto"
   xmlns:tools="http://schemas.android.com/tools"
   android:layout_width="match_parent"
   android:layout_height="match_parent"
   android:animateLayoutChanges="true"
   android:padding="20dp">
   <TextView
       android:id="@+id/dancer1"
       android:layout_width="wrap_content"
       android:layout_height="wrap_content"
       android:padding="10dp"
       android:text="DANCER 1"
       app:layout_constraintBottom_toTopOf="@id/dancer2"
       app:layout_constraintLeft_toLeftOf="parent"
       app:layout_constraintRight_toRightOf="parent"
       app:layout_constraintTop_toTopOf="parent"
       app:layout_constraintVertical_chainStyle="packed" />
   <TextView
       android:id="@+id/dancer2"
       android:layout_width="wrap_content"
       android:layout_height="wrap_content"
       android:padding="10dp"
       android:text="DANCER 2"
       app:layout_constraintBottom_toTopOf="@id/dancer3"
       app:layout_constraintLeft_toLeftOf="parent"
       app:layout_constraintRight_toRightOf="parent"
       app:layout_constraintTop_toBottomOf="@id/dancer1" />
   <TextView
       android:id="@+id/dancer3"
       android:layout_width="wrap_content"
       android:layout_height="wrap_content"
       android:padding="10dp"
       android:text="DANCER 3"
       app:layout_constraintBottom_toTopOf="@id/go12"
       app:layout_constraintLeft_toLeftOf="parent"
       app:layout_constraintRight_toRightOf="parent"
       app:layout_constraintTop_toBottomOf="@id/dancer2" />
</androidx.constraintlayout.widget.ConstraintLayout>
In our activity, we would set a click listener for a button that starts the animation – something like this:
rotate1and2.setOnClickListener {
   ValueAnimator.ofFloat(0F, 360F)
       .apply {
           addUpdateListener { animator ->
               val rotationValue = animator.animatedValue as Float
               dancer1.rotation = rotationValue
               dancer2.rotation = rotationValue
           }
           duration = 2000 // in ms = 2 sec
           start()
       }
}
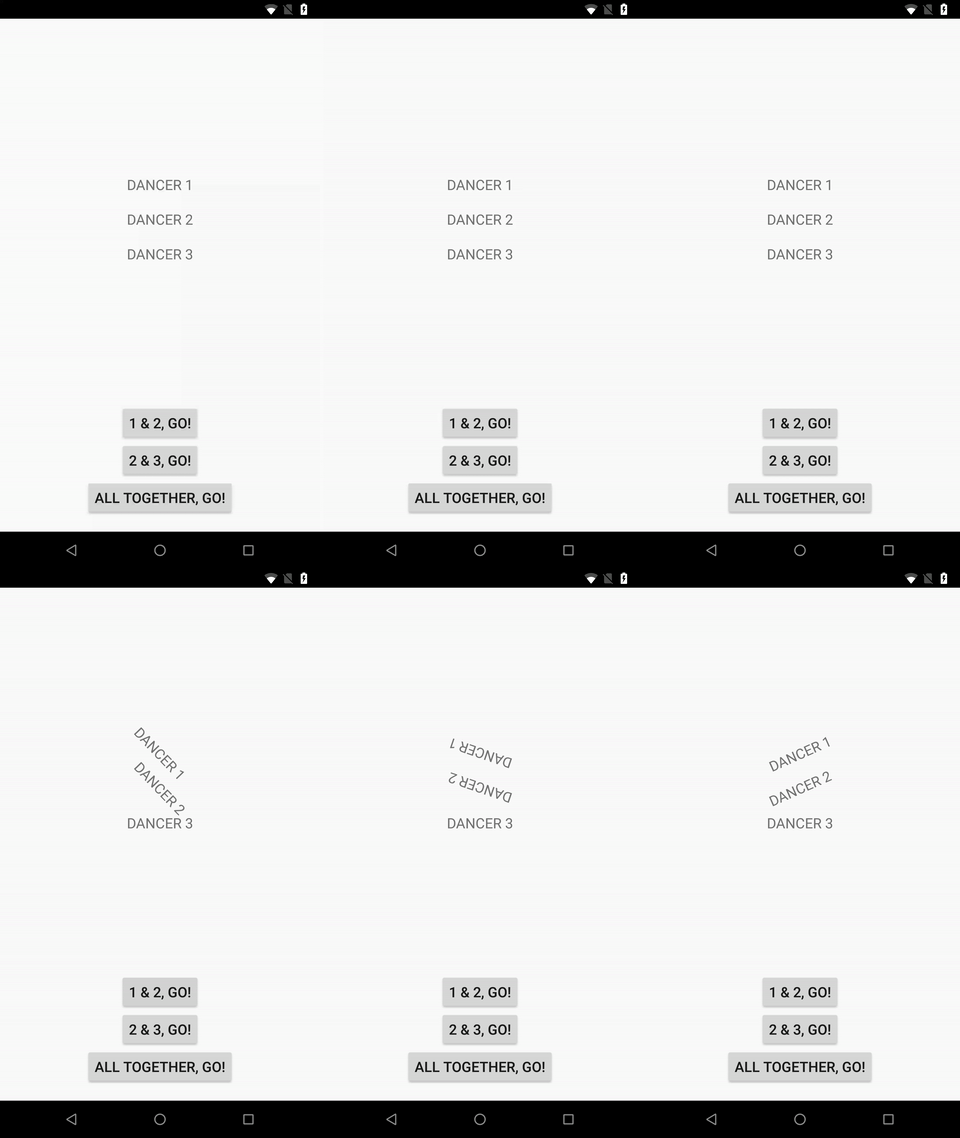
And the end result is this:
Now we have two text views which each rotate independently around their own axis.
However, we would like them to rotate together “like couples” so that Dancer 1 and Dancer 2 rotate together, and Dancer 2 and Dancer 3 can also do this. We would also like all three to rotate as one unit.
If we put Dancer 1 and Dancer 2 in, let’s say, LinearLayout and then rotate that view, we would not then be able to rotate Dancer 2 and Dancer 3.
So we are going to use Layer and put our dancers into virtual view, which will help us to rotate them. We just need to add the following to our layout:
<androidx.constraintlayout.helper.widget.Layer
   android:id="@+id/couple1and2"
   android:layout_width="wrap_content"
   android:layout_height="wrap_content"
   app:constraint_referenced_ids="dancer1,dancer2"
   tools:ignore="MissingConstraints" />
<androidx.constraintlayout.helper.widget.Layer
   android:id="@+id/couple2and3"
   android:layout_width="wrap_content"
   android:layout_height="wrap_content"
   app:constraint_referenced_ids="dancer2,dancer3"
   tools:ignore="MissingConstraints" />
<androidx.constraintlayout.helper.widget.Layer
   android:id="@+id/allThreeDancers"
   android:layout_width="wrap_content"
   android:layout_height="wrap_content"
   app:constraint_referenced_ids="dancer1,dancer2,dancer3"
   tools:ignore="MissingConstraints" />
Now we can animate the rotation of those virtual views, for example, couple1and2
rotate1and2.setOnClickListener {
   ValueAnimator.ofFloat(0F, 360F)
       .apply {
           addUpdateListener { animator ->
               couple1and2.rotation = animator.animatedValue as Float
           }
           duration = 2000 // in ms = 2 sec
           start()
       }
}
And the end result is this:
Now we can create as many virtual groups as we want and apply animations to those groups as needed. There are many possibilities, and for more details, please refer to the Layer documentation.
Conclusion
So, ConstraintLayout and its views continue to improve with every new version that becomes available.
These views that we play with in this article solve some old problems we used to have before, some UI layouts now will be easier to implement and UX can be improved.
The best part is that we can do all of that with less lines of code. And we all know that developers are lazy and live by the “less is more” rule.
I hope that you are already thinking about where and how you will use some of those new views, and that this article helped you to take a peek at what new ConstraintLayout has to offer. If not … then you must be an iOS developer.
If you have any questions, or want to work with an experienced iOS team, feel free to contact us at business@decode.agency

