
Taming the app flow with coordinators
And saying good-bye to the massive ViewControllers.
We’ve already published a piece on the MVVM pattern →
As well as one on the use of coordinators →
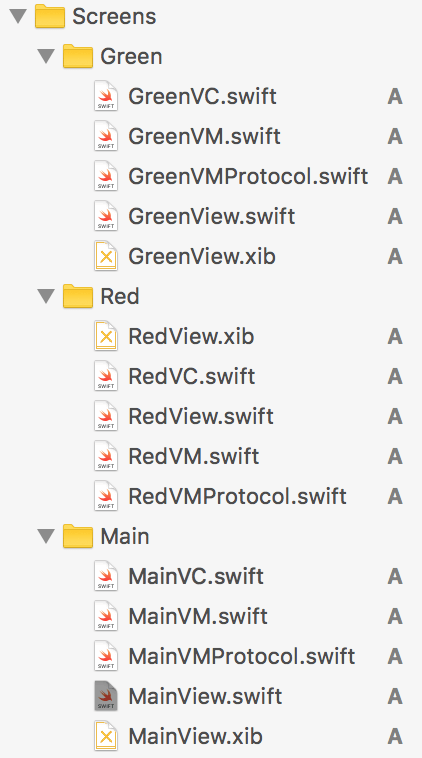
We’ll group the screens of our Red & Green App semantically into units. Every unit comprises the following components:
ViewModelProtocol is used to further encapsulate the communication between the ViewController and ViewModel.
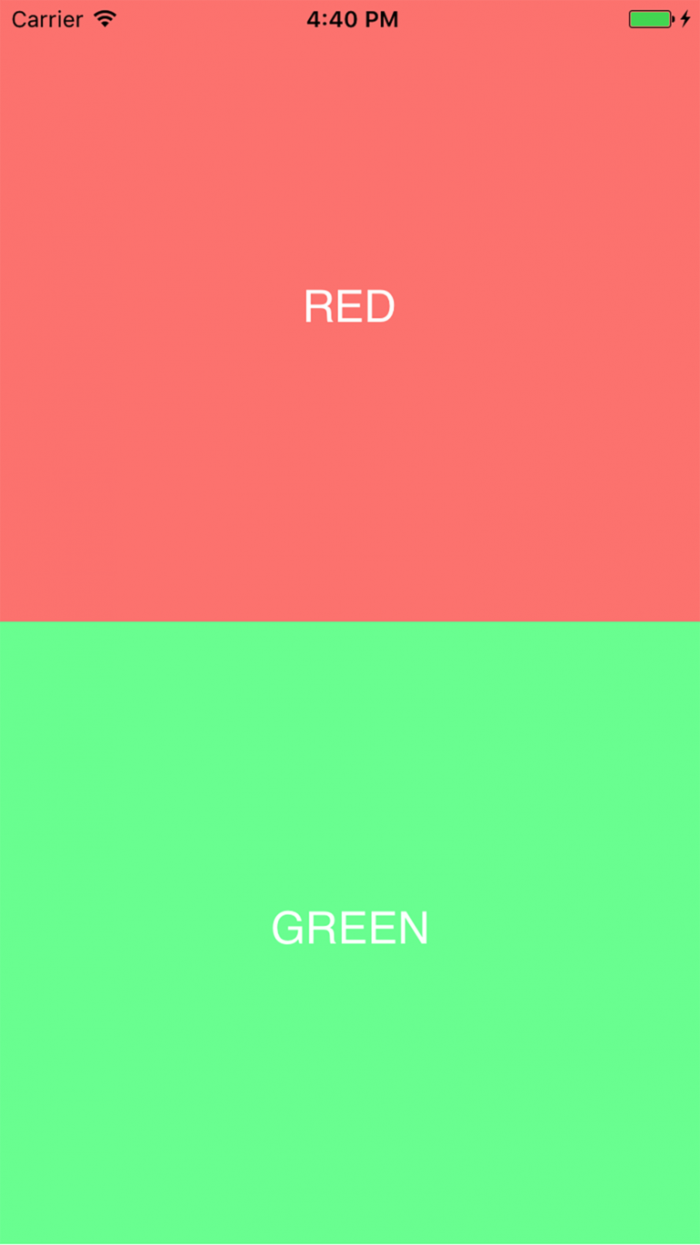
Our app has a main screen where we get to pick the red or green color. Picking the red color takes us to the red screen, and the green color takes us to the green screen.
Every VC is initialized through two components:
Let’s dig in and define the main screen. We’ll call it the MainVC:
class MainVC: UIViewController {
    var mainView: MainView {
        return view as! MainView
    }

    let viewModel: MainVMProtocol

    init(viewModel: MainVMProtocol) {
        self.viewModel = viewModel
        super.init(nibName: nil, bundle: nil)
    }

    required init?(coder aDecoder: NSCoder) {
        fatalError("init(coder:) has not been implemented")
    }

    override func loadView() {
        view = Bundle.main.loadNibNamed("MainView", owner: nil, options: nil)!.first as! UIView
    }

    override func viewDidLoad() {
        super.viewDidLoad()
        mainView.redButton.addTarget(self, action: #selector(redButtonAction), for: .touchUpInside)
        mainView.greenButton.addTarget(self, action: #selector(greenButtonAction), for: .touchUpInside)
    }

    override func viewWillAppear(_ animated: Bool) {
        super.viewWillAppear(animated)
    }

    @objc private func redButtonAction() {
        viewModel.didPressRedButton?()
    }

    @objc private func greenButtonAction() {
        viewModel.didPressGreenButton?()
    }
}
LoadNibFromEnum you see there is our custom function that we use to call Nibs:
import UIKit
class MainView: UIView {

    @IBOutlet weak var redButton: UIButton!
    @IBOutlet weak var greenButton: UIButton!

    override init(frame: CGRect) {
        super.init(frame: frame)
    }

    required init?(coder aDecoder: NSCoder) {
        super.init(coder: aDecoder)
    }


    override func awakeFromNib() {
        super.awakeFromNib()
    }
}
The View is defined with the corresponding XIB, where there are two buttons, which are exposed on the screen so the actions on them can be defined.
import UIKit
class MainView: UIView {

    @IBOutlet weak var redButton: UIButton!
    @IBOutlet weak var greenButton: UIButton!

    override init(frame: CGRect) {
        super.init(frame: frame)
    }

    required init?(coder aDecoder: NSCoder) {
        super.init(coder: aDecoder)
    }


    override func awakeFromNib() {
        super.awakeFromNib()
    }
}
The ViewModelProtocol defines all the actions that can be executed on the VC-VM relation. In this particular case, we only need to define actions on the two aforementioned buttons, so this is what we’ll do:
protocol MainVMProtocol {
    var didPressRedButton: (() -> ())? { set get }
    var didPressGreenButton: (() -> ())? { set get }
}
Actions can be defined in multiple ways, but we define them exclusively through blocks, for the sake of code legibility.
ViewModel can be a class or a structure that conforms to the ViewModelProtocol, which means that all methods or actions defined in the ViewModelProtocol must be defined in the ViewModel as well.
class MainVM: MainVMProtocol {
    var didPressRedButton: (() -> ())?
    var didPressGreenButton: (() -> ())?
}
Then we can finally connect the button actions from the view with the actions defined in the ViewModel:
class MainVC: UIViewController {
    var mainView: MainView {
        return view as! MainView
    }

    let viewModel: MainVMProtocol

    init(viewModel: MainVMProtocol) {
        self.viewModel = viewModel
        super.init(nibName: nil, bundle: nil)
    }

    required init?(coder aDecoder: NSCoder) {
        fatalError("init(coder:) has not been implemented")
    }

    override func loadView() {
        view = Bundle.main.loadNibNamed("MainView", owner: nil, options: nil)!.first as! UIView
    }

    override func viewDidLoad() {
        super.viewDidLoad()
        mainView.redButton.addTarget(self, action: #selector(redButtonAction), for: .touchUpInside)
        mainView.greenButton.addTarget(self, action: #selector(greenButtonAction), for: .touchUpInside)
    }

    override func viewWillAppear(_ animated: Bool) {
        super.viewWillAppear(animated)
    }

    @objc private func redButtonAction() {
        viewModel.didPressRedButton?()
    }

    @objc private func greenButtonAction() {
        viewModel.didPressGreenButton?()
    }
}
Sign up for free
Our MainView is exposed so we can define all the actions over the buttons in the viewDidLoad and forward every action to the block in the ViewModel.
That way the ViewController doesn’t have to know what’s going to happen next in navigation and has no responsibilities save for controlling the UI.
We’ll define the green and the red screen in the same way. The screens of the Red & Green app are pretty empty save for the color, so we won’t bother writing code to define anything regarding the way they look.
However, we will override the back button navigation on both screens, since we want all transitions to be carried out via coordinators.
The GreenVC and RedVC will look like this:
class GreenVC: UIViewController {
    var mainView: GreenView {
        return view as! GreenView
    }

    let viewModel: GreenVMProtocol

    init(viewModel: GreenVMProtocol) {
        self.viewModel = viewModel
        super.init(nibName: nil, bundle: nil)
    }

    required init?(coder aDecoder: NSCoder) {
        fatalError("init(coder:) has not been implemented")
    }

    override func loadView() {
        view = Bundle.main.loadNibNamed("GreenView", owner: nil, options: nil)!.first as! UIView
    }

    override func viewDidLoad() {
        super.viewDidLoad()
    }

    override func viewWillAppear(_ animated: Bool) {
        super.viewWillAppear(animated)

        navigationItem.hidesBackButton = true
        let newBackButton = UIBarButtonItem(title: "Back", style: UIBarButtonItemStyle.plain, target: self, action: #selector(back(sender:)))
        self.navigationItem.leftBarButtonItem = newBackButton

    }

    func back(sender: UIBarButtonItem) {
        viewModel.didPressNavigationBarBackButton?()
    }
}
We made a navigation button and made a custom back button action defined through a block and in the coordinator.
The structure of the screen within the app consists of:
Every screen must have that structure.
Now let’s define that main coordinator:
class Coordinator: NSObject {

    let rootNavigationController: UINavigationController

    var onEnd: (() -> Void)?

    private(set) var coordinators = [Coordinator]()

    init(rootNavigationController: UINavigationController) {
        self.rootNavigationController = rootNavigationController
        self.coordinators = []
    }

    func add(childCoordinator: Coordinator) {
        coordinators.append(childCoordinator)
    }

    @discardableResult
    func remove(childCoordinator: Coordinator) -> Coordinator? {
        if let index = coordinators.index(of: childCoordinator) {
            return coordinators.remove(at: index)
        } else {
            return nil
        }
    }

    func start() {
        // To be overriden
    }
}
In our post “Taming the app flow with coordinators” we already explained how to structure the main coordinator.
What’s important here that there is a root controller that all the new screens are set on, an array in which all the future coordinators will be saved, a onEnd block where the deallocation of the coordinator is executed, as well as a start method that initiates the coordinator and all the flow within it.
Now let’s create the main coordinator. It will be a final class, so it cannot be subclassed further, and it will inherit the coordinator object.
Initially, it contains only the start method which calls the private function to start the main flow. Within it, we’ll define the ViewModel i ViewController, as well as all the actions defined in the ViewModel.
final class MainCoordinator: Coordinator {

    override func start() {
        configureMainFlow()
    }

    private func configureMainFlow() {
        let mainVM = MainVM()
        let mainVC = MainVC(viewModel: mainVM)

        mainVM.didPressRedButton = {
            self.redButtonFlow()
        }

        mainVM.didPressGreenButton = {
            self.greenButtonFlow()
        }

        rootNavigationController.setViewControllers([mainVC], animated: false)
    }

    func redButtonFlow() {
    }

    func greenButtonFlow() {
    }
}
At the moment, the Green Button flow and the Red button flow are empty. Since clicking on each button will open a sequence of screens, it’s supposable that the screens are a part of a story. And since we define our coordinators semantically, the best practice is to create a coordinator for every story.
In this example, this means that we’ll create RedCoordinator and GreenCoordinator.
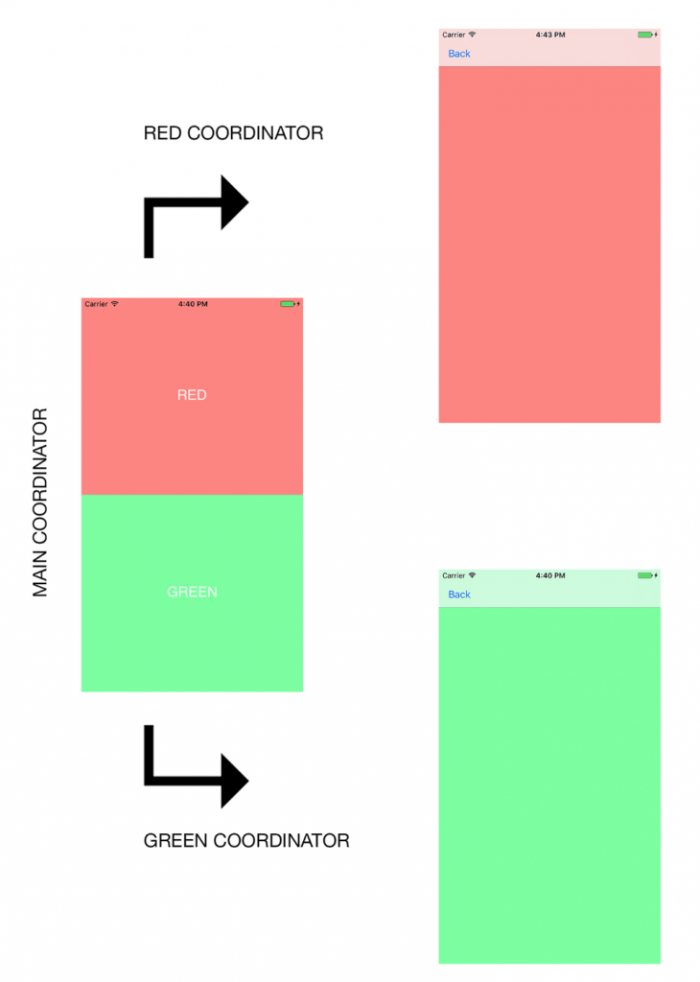
They will also be final classes that inherit the coordinator object. It too will initially only define the start method. Then we’ll define the ViewModel and ViewController, and add the backbutton function to the ViewController. If we’re leaving the current coordinator, it’s important that we remove all strong references to it so it gets deallocated.
We do that by calling a onEnd block.
So here’s the GreenCoordinator:
final class GreenCoordinator: Coordinator {

    override func start() {
        configureGreenScreenFlow()
    }

    private func configureGreenScreenFlow() {
        let greenVM = GreenVM()
        let greenVC = GreenVC(viewModel: greenVM)

        greenVM.didPressNavigationBarBackButton = {
            self.onEnd?()
            self.rootNavigationController.popViewController(animated: true)
        }

        rootNavigationController.pushViewController(greenVC, animated: true)
    }
}
Now we can define the function within the main coordinator which we use to call the GreenCoordinator:
    func greenButtonFlow() {
        let greenCoordinator = GreenCoordinator(rootNavigationController: rootNavigationController)
        greenCoordinator.start()

        add(childCoordinator: greenCoordinator)

        greenCoordinator.onEnd = {
            self.remove(childCoordinator: greenCoordinator)
        }
    }
It’s a pretty straightforward process: We create the coordinator, start it, add it to stack with the add method defined within the coordinator, define the action for removing the coordinator from the stack, called by the OnEnd block.
We do the same for the Red Screen.
All that’s left now is to start the main coordinator somewhere, and the only logical place is the AppDelegate. In the AppDidFinishLaunching we define the navigation controller which we submit to the main coordinator to execute further transitions.
    func application(_ application: UIApplication, didFinishLaunchingWithOptions launchOptions: [UIApplicationLaunchOptionsKey: Any]?) -> Bool {

        window = UIWindow(frame: UIScreen.main.bounds)

        let rootNC = UINavigationController()

        window!.makeKeyAndVisible()
        window!.rootViewController = rootNC

        let mainCoordinator = MainCoordinator(rootNavigationController: rootNC)
        mainCoordinator.start()

        return true
    }
And that’s about it.
And it all sums up to cleaner code, less responsibility for the Controller and the ViewModel and better separation of concerns.

When something unusual happens, Vlado is the man with an explanation. An experienced iOS Team Lead with a PhD in Astrophysics, he has a staggering knowledge of IT. Vlado has a lot of responsibilities, but still has time to help everybody on the team, no matter how big or small the need. His passions include coffee brewing, lengthy sci-fi novels and all things Apple. On nice days, you might find Vlado on a trail run. On rainier days, you’ll probably find him making unique furniture in the garage.
And saying good-bye to the massive ViewControllers.

There are different ways to create your Views: the good old option of creating them programmatically, using XIBs, or the latest Apple-provided format, Storyboard. There’s quite a lot of discord over what the best method is, and there is no universal answer.

What a difference a ViewModel makes.